
Graphite sketching
Probably the most well known of all art techniques
The products I recommend are highlighted in green
What are the best graphite sketching pencils? is a question I am sometimes asked.
You often hear drawing pencils being referred to as 'lead' pencils. There is in fact no lead present in any pencil. The material is graphite which is a carbon and completely safe to use. Graphite is naturally shiny. However this shine can be reduced if the graphite is applied with a layering technique. Lighter pencils can be used in the initial layers followed by darker pencils.
Graphite pencils are graded according to their degree of hardness and blackness. 'H' for hard and 'B' for blackness. 'HB' is the bridge between the two grades. When first starting to draw, stick to the 'HB' and 'B' grade pencils. You can progress to the harder ones later if you decide to have finer detail in your drawings. Pencils that display an 'F' are pencils with very fine points for people who require more detail. They are slightly harder than the other grades and therefore hold their tip for longer.
Everybody can draw. You just have to be able to hold a pencil . Sometimes, when people decide to start drawing, they make the mistake of buying too many products and feel obliged to use them all in trying to include everything they see in their picture. They go out looking for the perfect view. If they are indoors, they often try to draw an entire room with all its contents. These would be truly daunting tasks for any artist. When you start to draw, keep it simple. Drawing is all about light and shade. Get the shading right and your pictures will instantly take on a three dimensional look. When starting out, keep away from figure drawing, portraits, and over complicated architecture. There will be plenty of time for these later. If we get a nose on a face a centimetre too far to the left it will look very strange. If we get a tree a centimetre too far to the left, nobody will ever know!
Always buy the best quality art materials you can afford. Cheap materials, although good for the bank balance, will not give you pleasing results.
You do not need a huge quantity of graphite pencils to start drawing. In addition to the everyday HB pencil, a 2B, 6B and an 8B will be quite sufficient.
This little drawing was completed using just four graphite pencils on cartridge paper. You don't need a ton of art materials in order to produce good work.
Do as much sketching outside in the fresh air as you can. There is nothing more rewarding than drawing from nature.
What makes a good pencil and how can you recognise them? Pencils for sketching should be soft enough for quick drawing, but also smudge resistant so that your work does not get damaged when you close up your sketch book at the end of a drawing session. A professional quality pencil must be smooth and contain excellent consistency as you use up the lead. They should sharpen easily. Some cheaper pencils are made with very hard wood and splinter and break when sharpened. The Faber Castell graphite sketching pencils, which are the ones of my choice, have break resistant leads. This is because the lead is glued to the wood on both sides down the whole length of the pencil. They also smudge less than many other graphite pencil brands
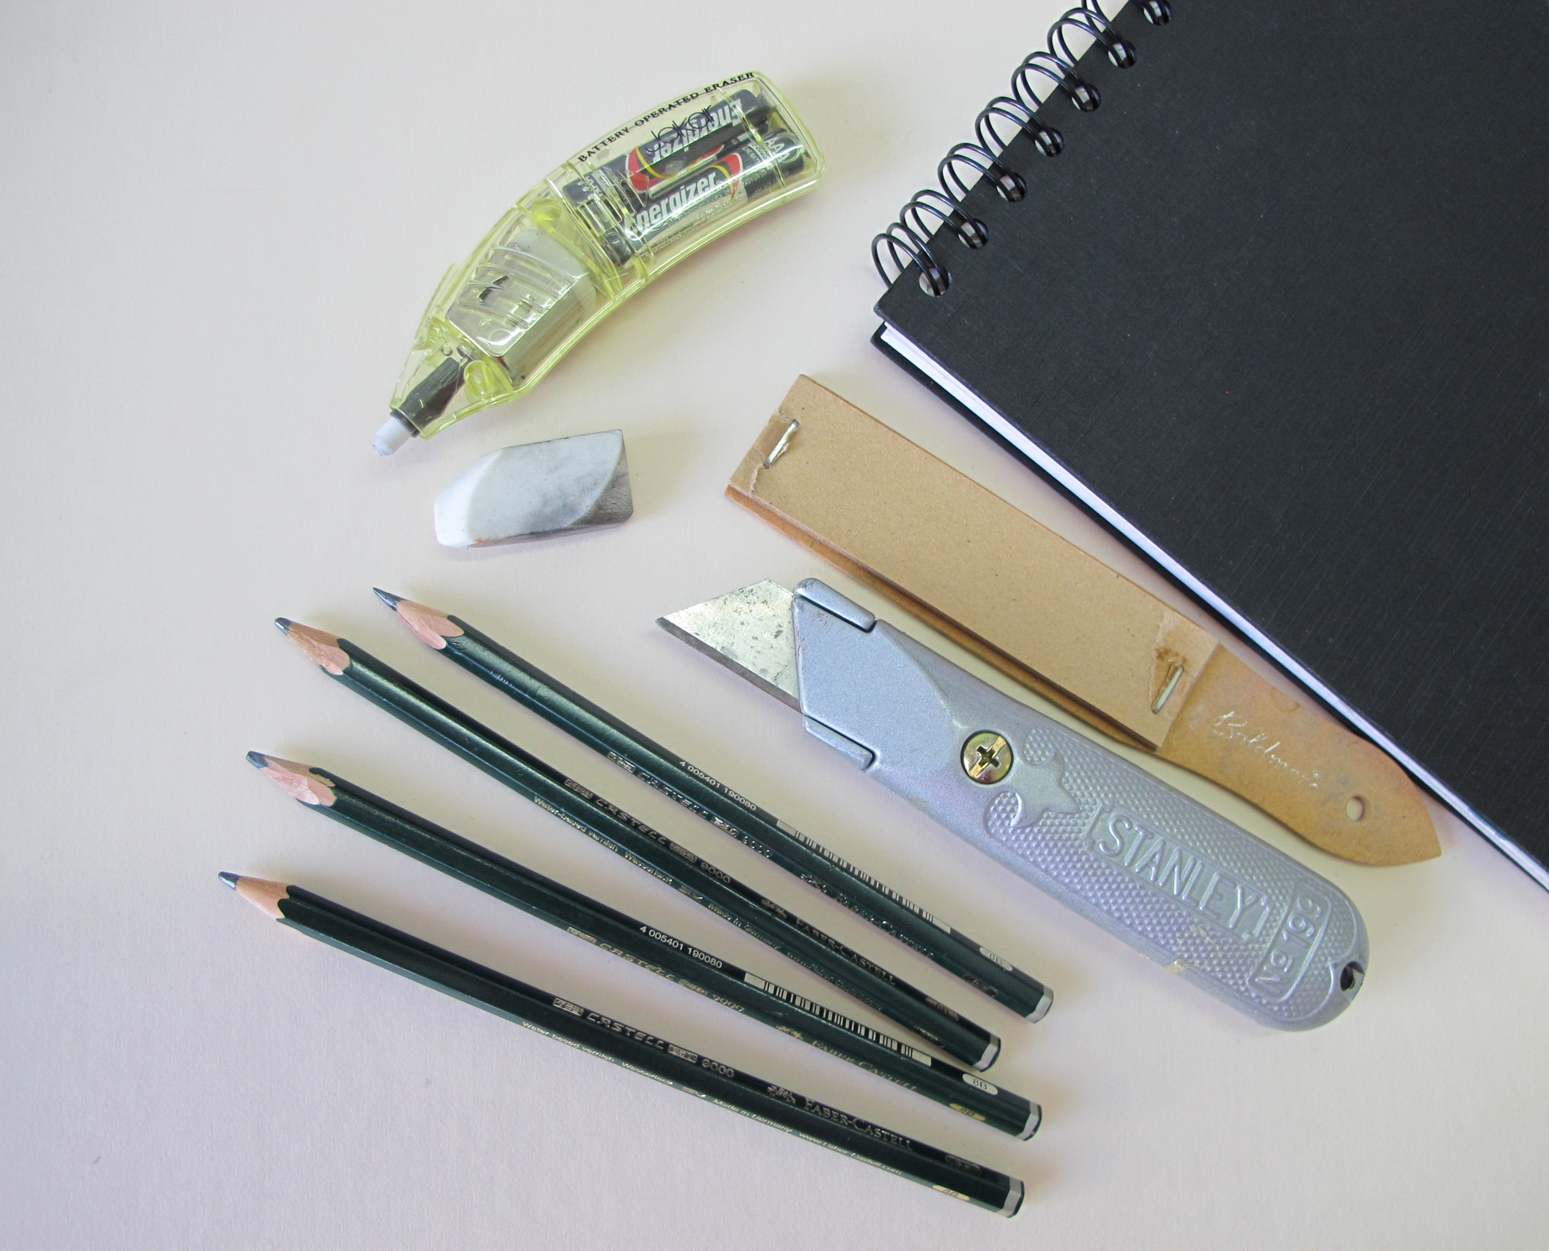
Let's look at the materials that you will need and maybe already have - firstly, good quality graphite pencils. You will also need a few more things to get you started. A craft knife, a small amount of fine sandpaper to refine the pencil's point, good quality sketching paper or sketch pad (minimum weight 170gsm) and a soft rubber. A little battery operated eraser is not essential, however you can get really sharp highlight lines and marks when using it. Also, it's great fun!
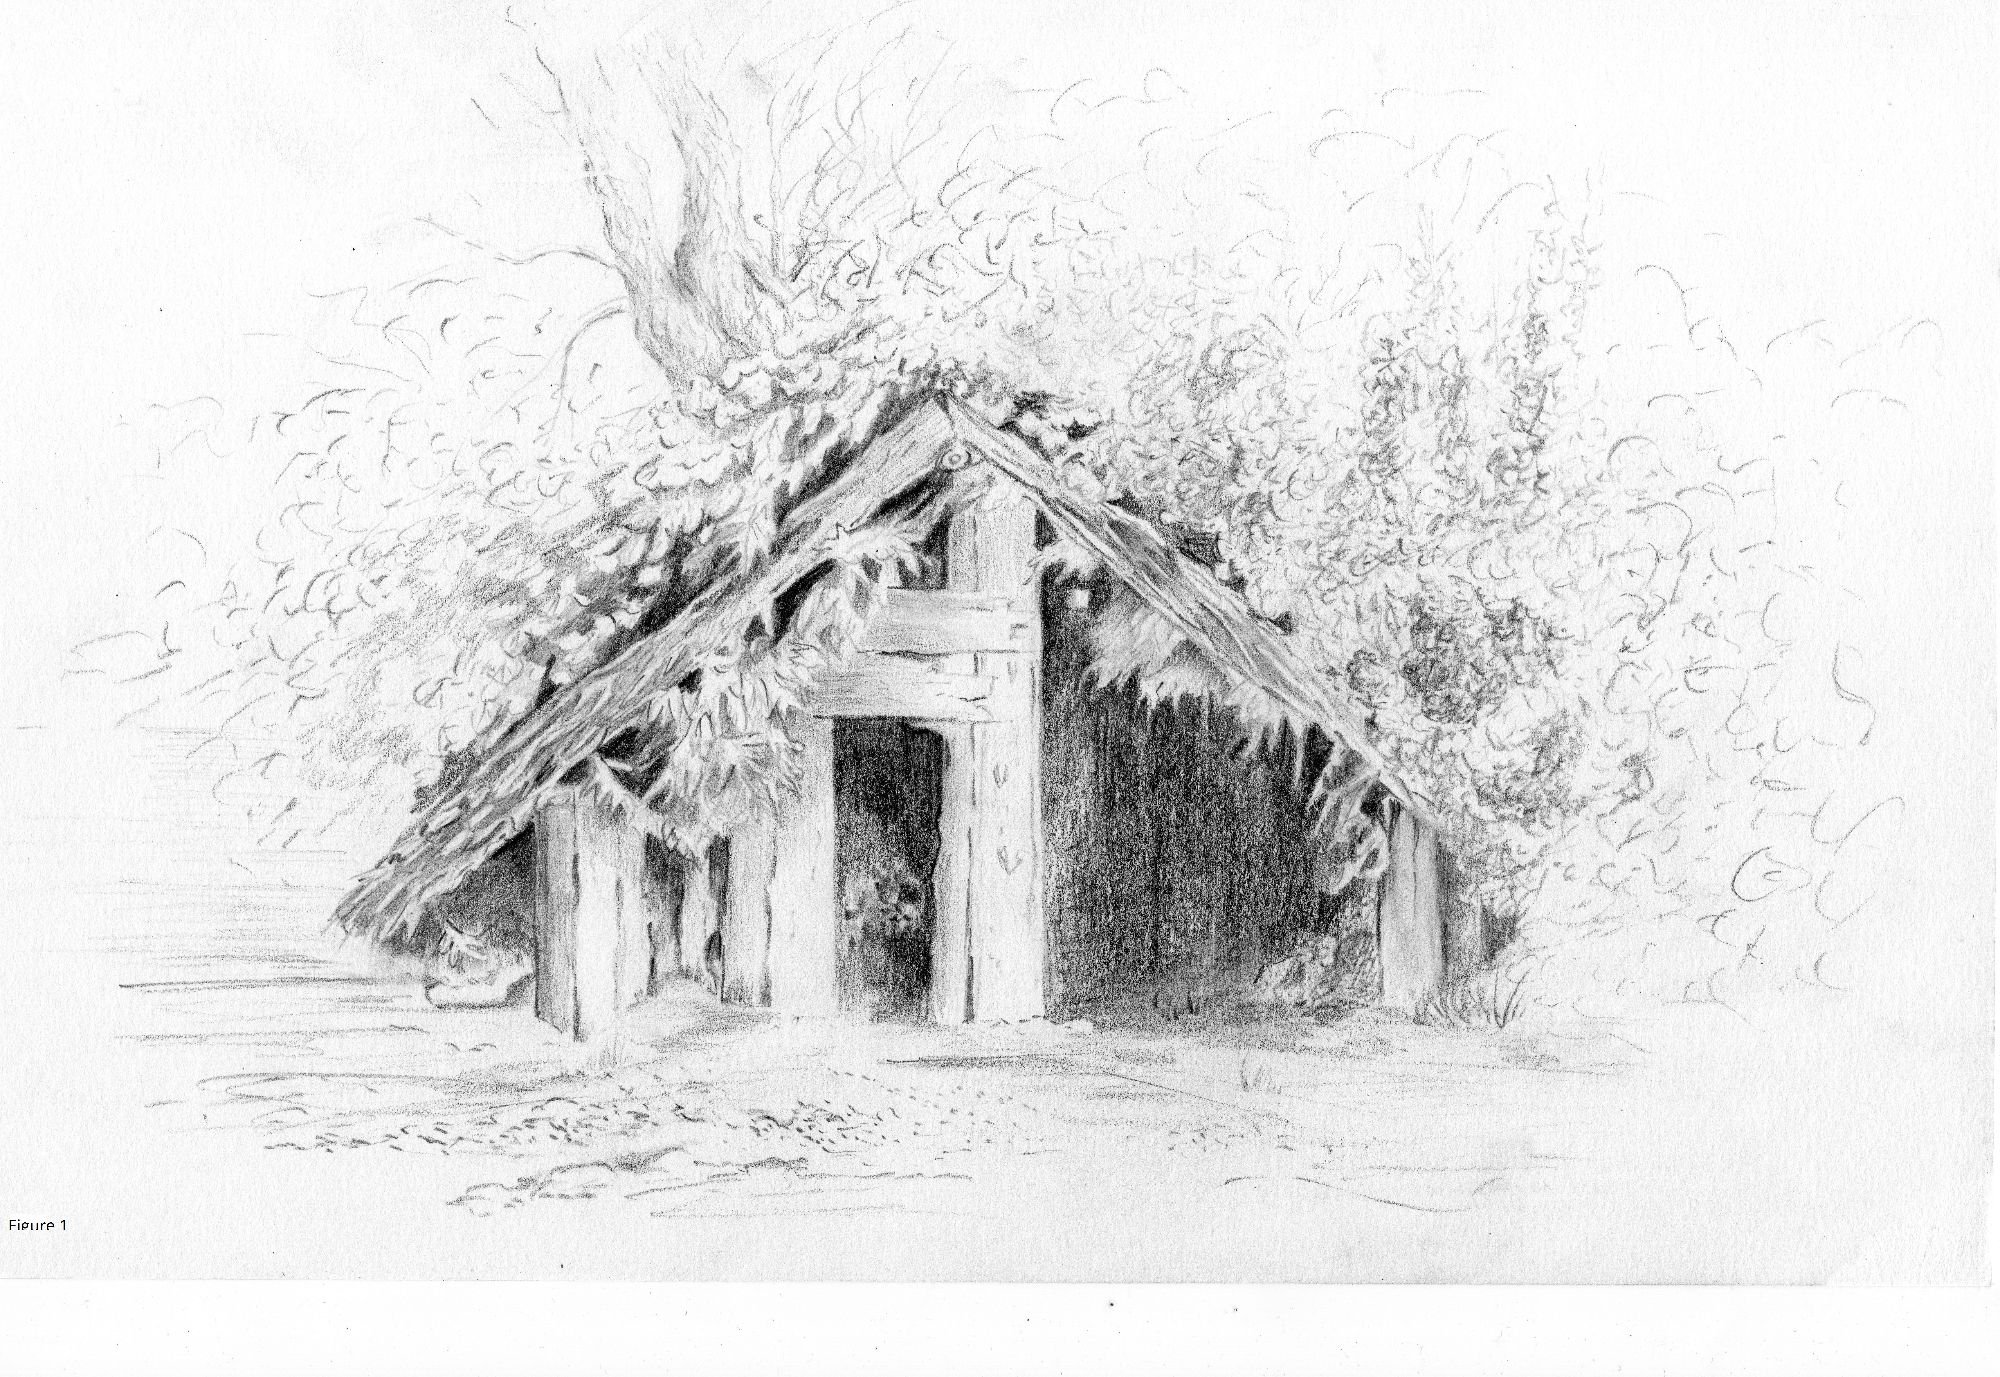
Graphite pencil on 200gsm cartridge paper
Only three grades of pencil were used for these three drawings: 2B, 6B & 8B.
Lots of examples of 'counterchange' (light against dark and dark against light
Highlights removed using a battery operated eraser
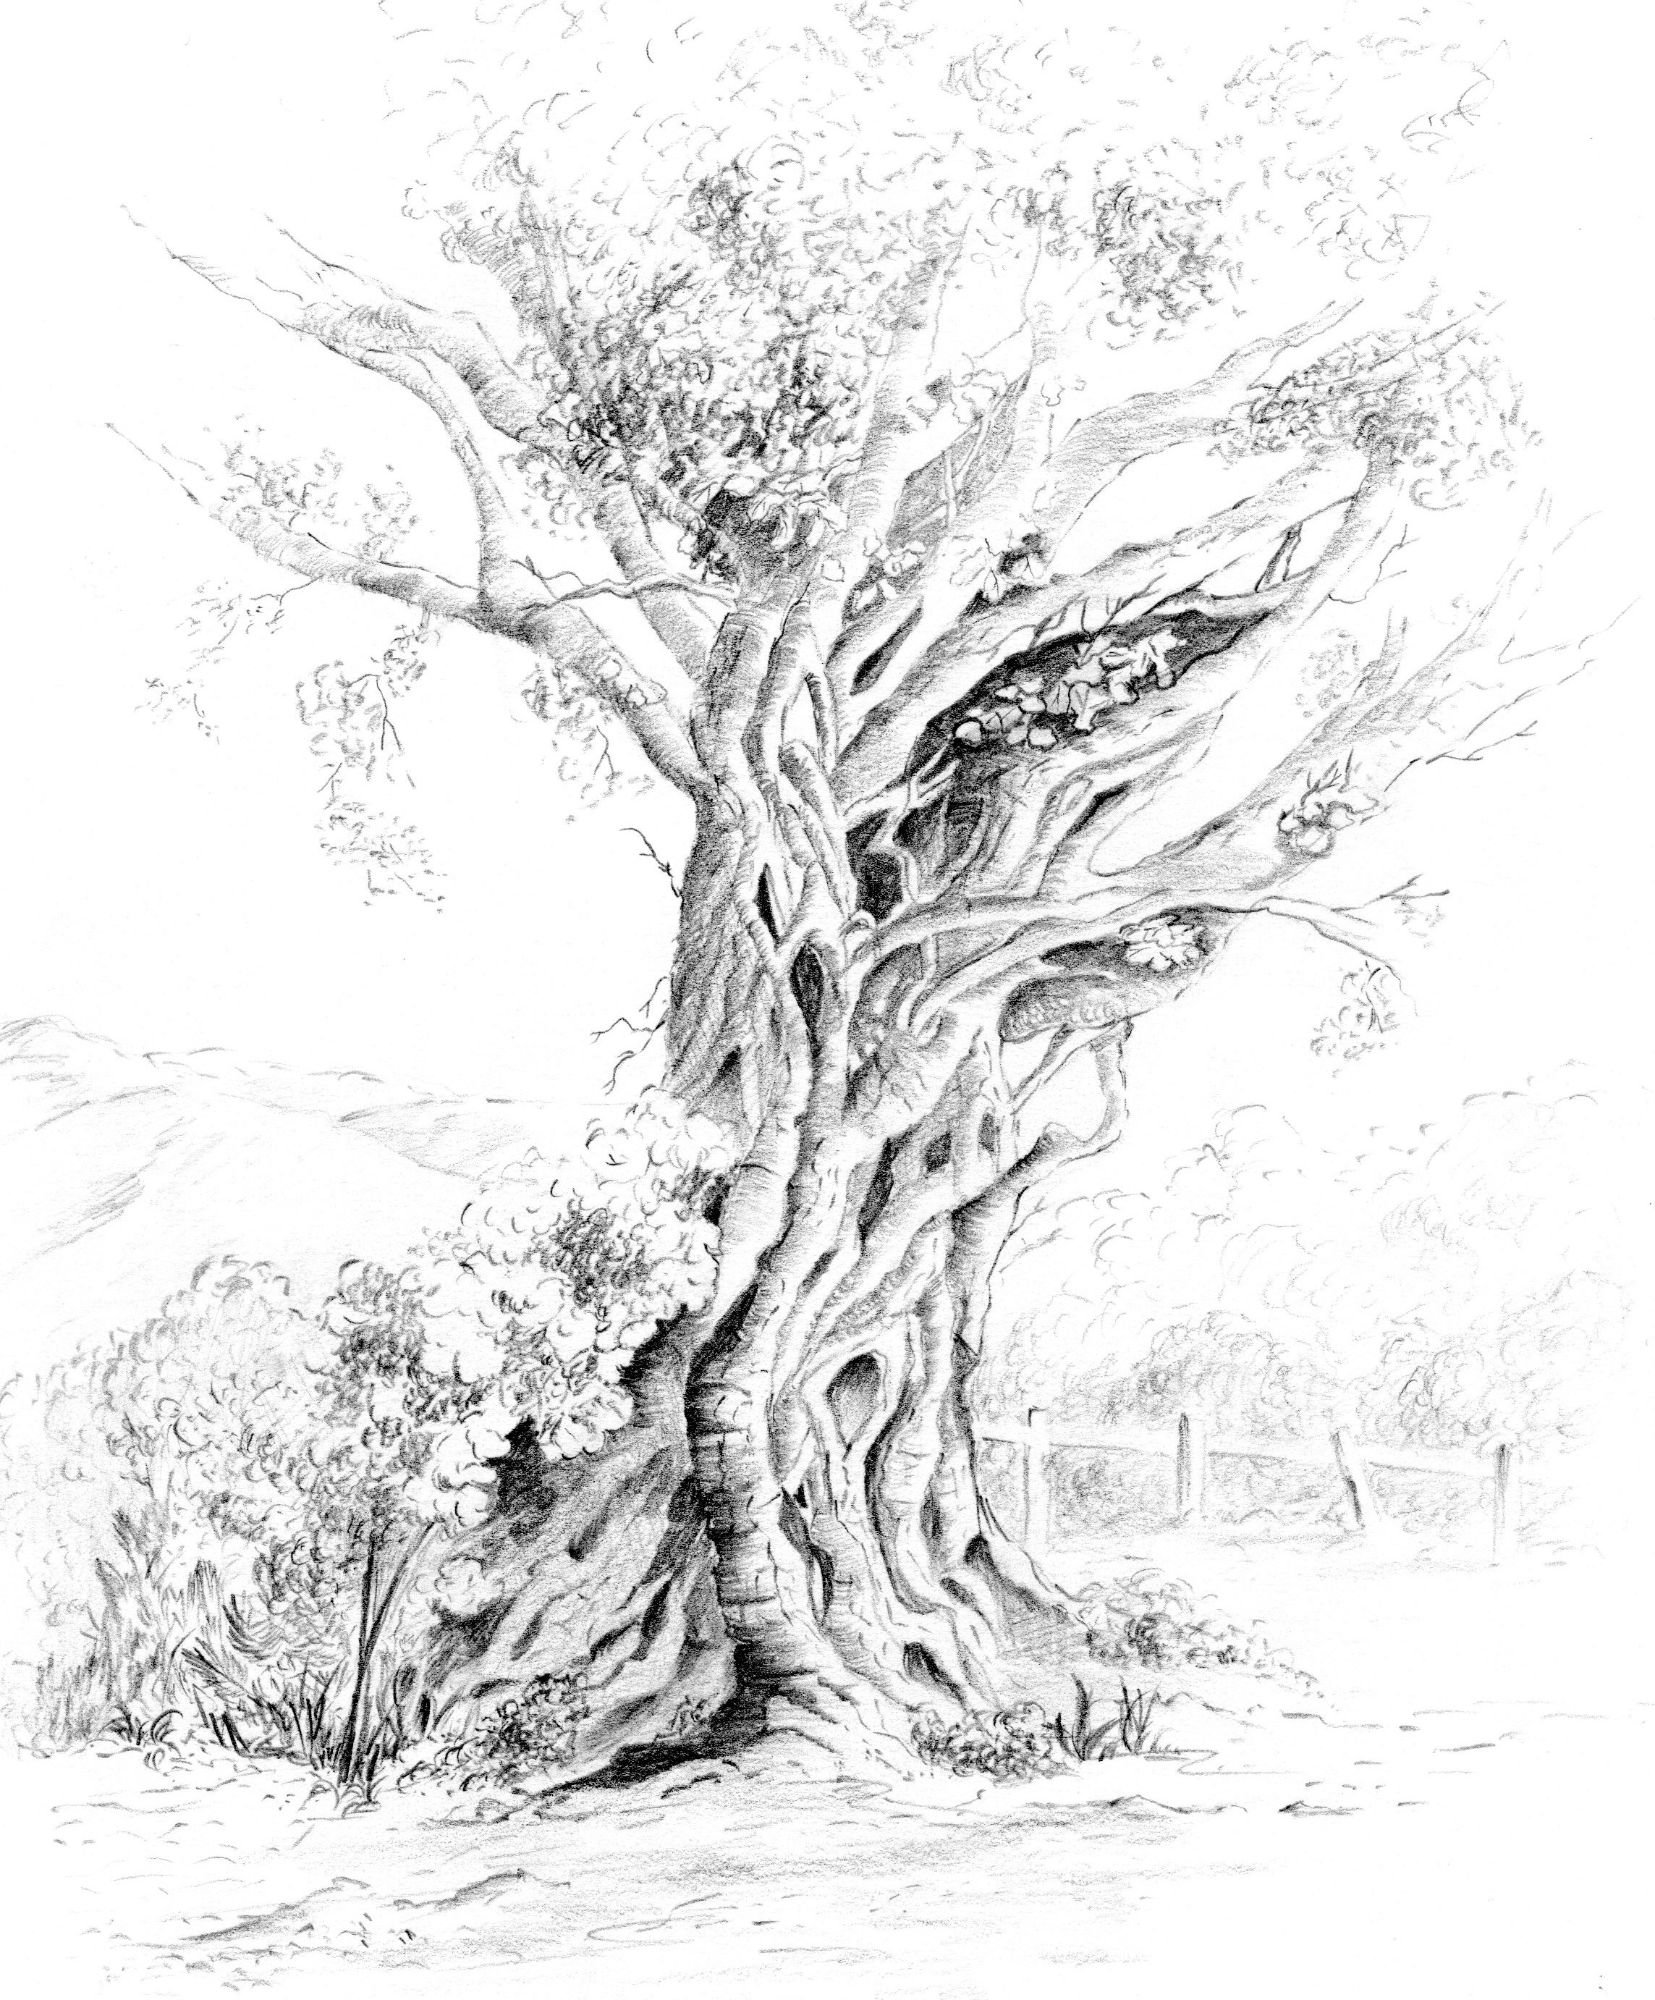
The shading marks follow the contours of the tree to show texture
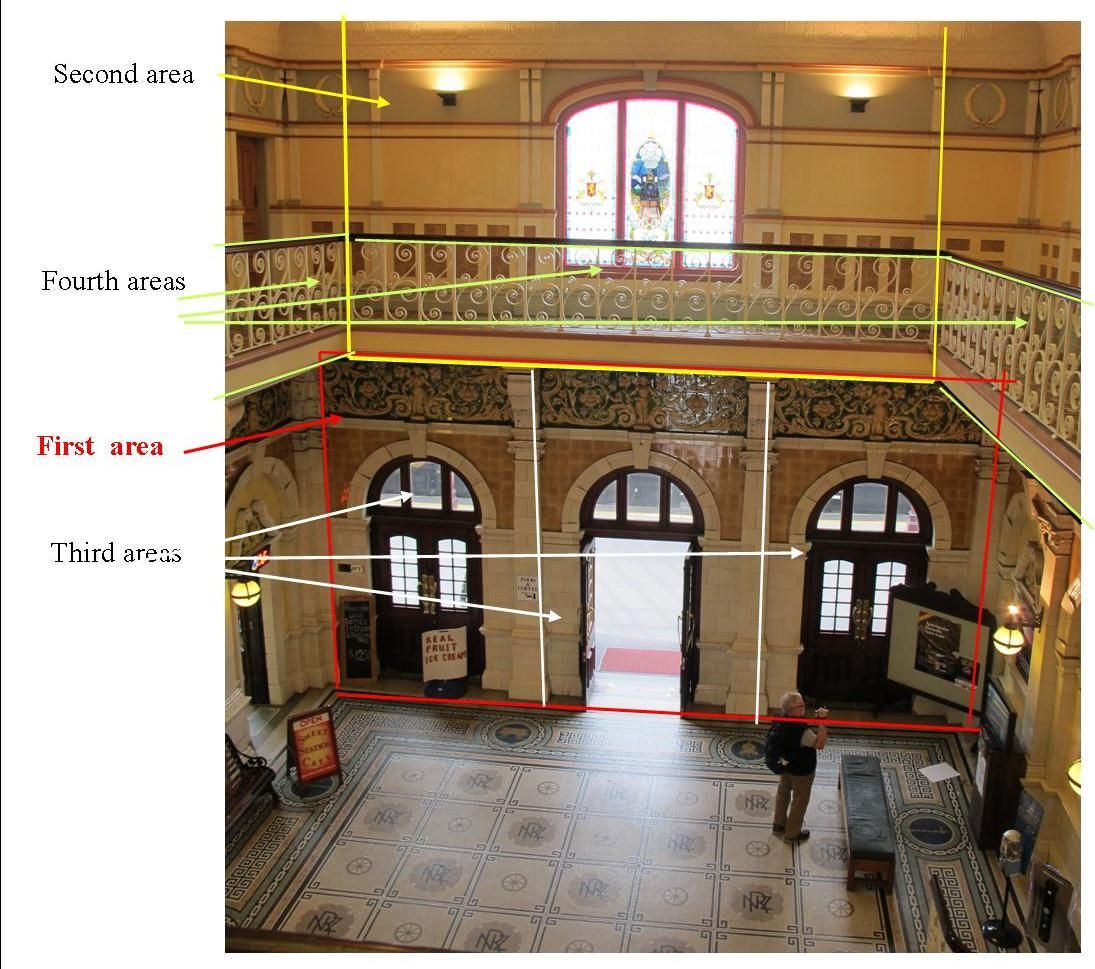
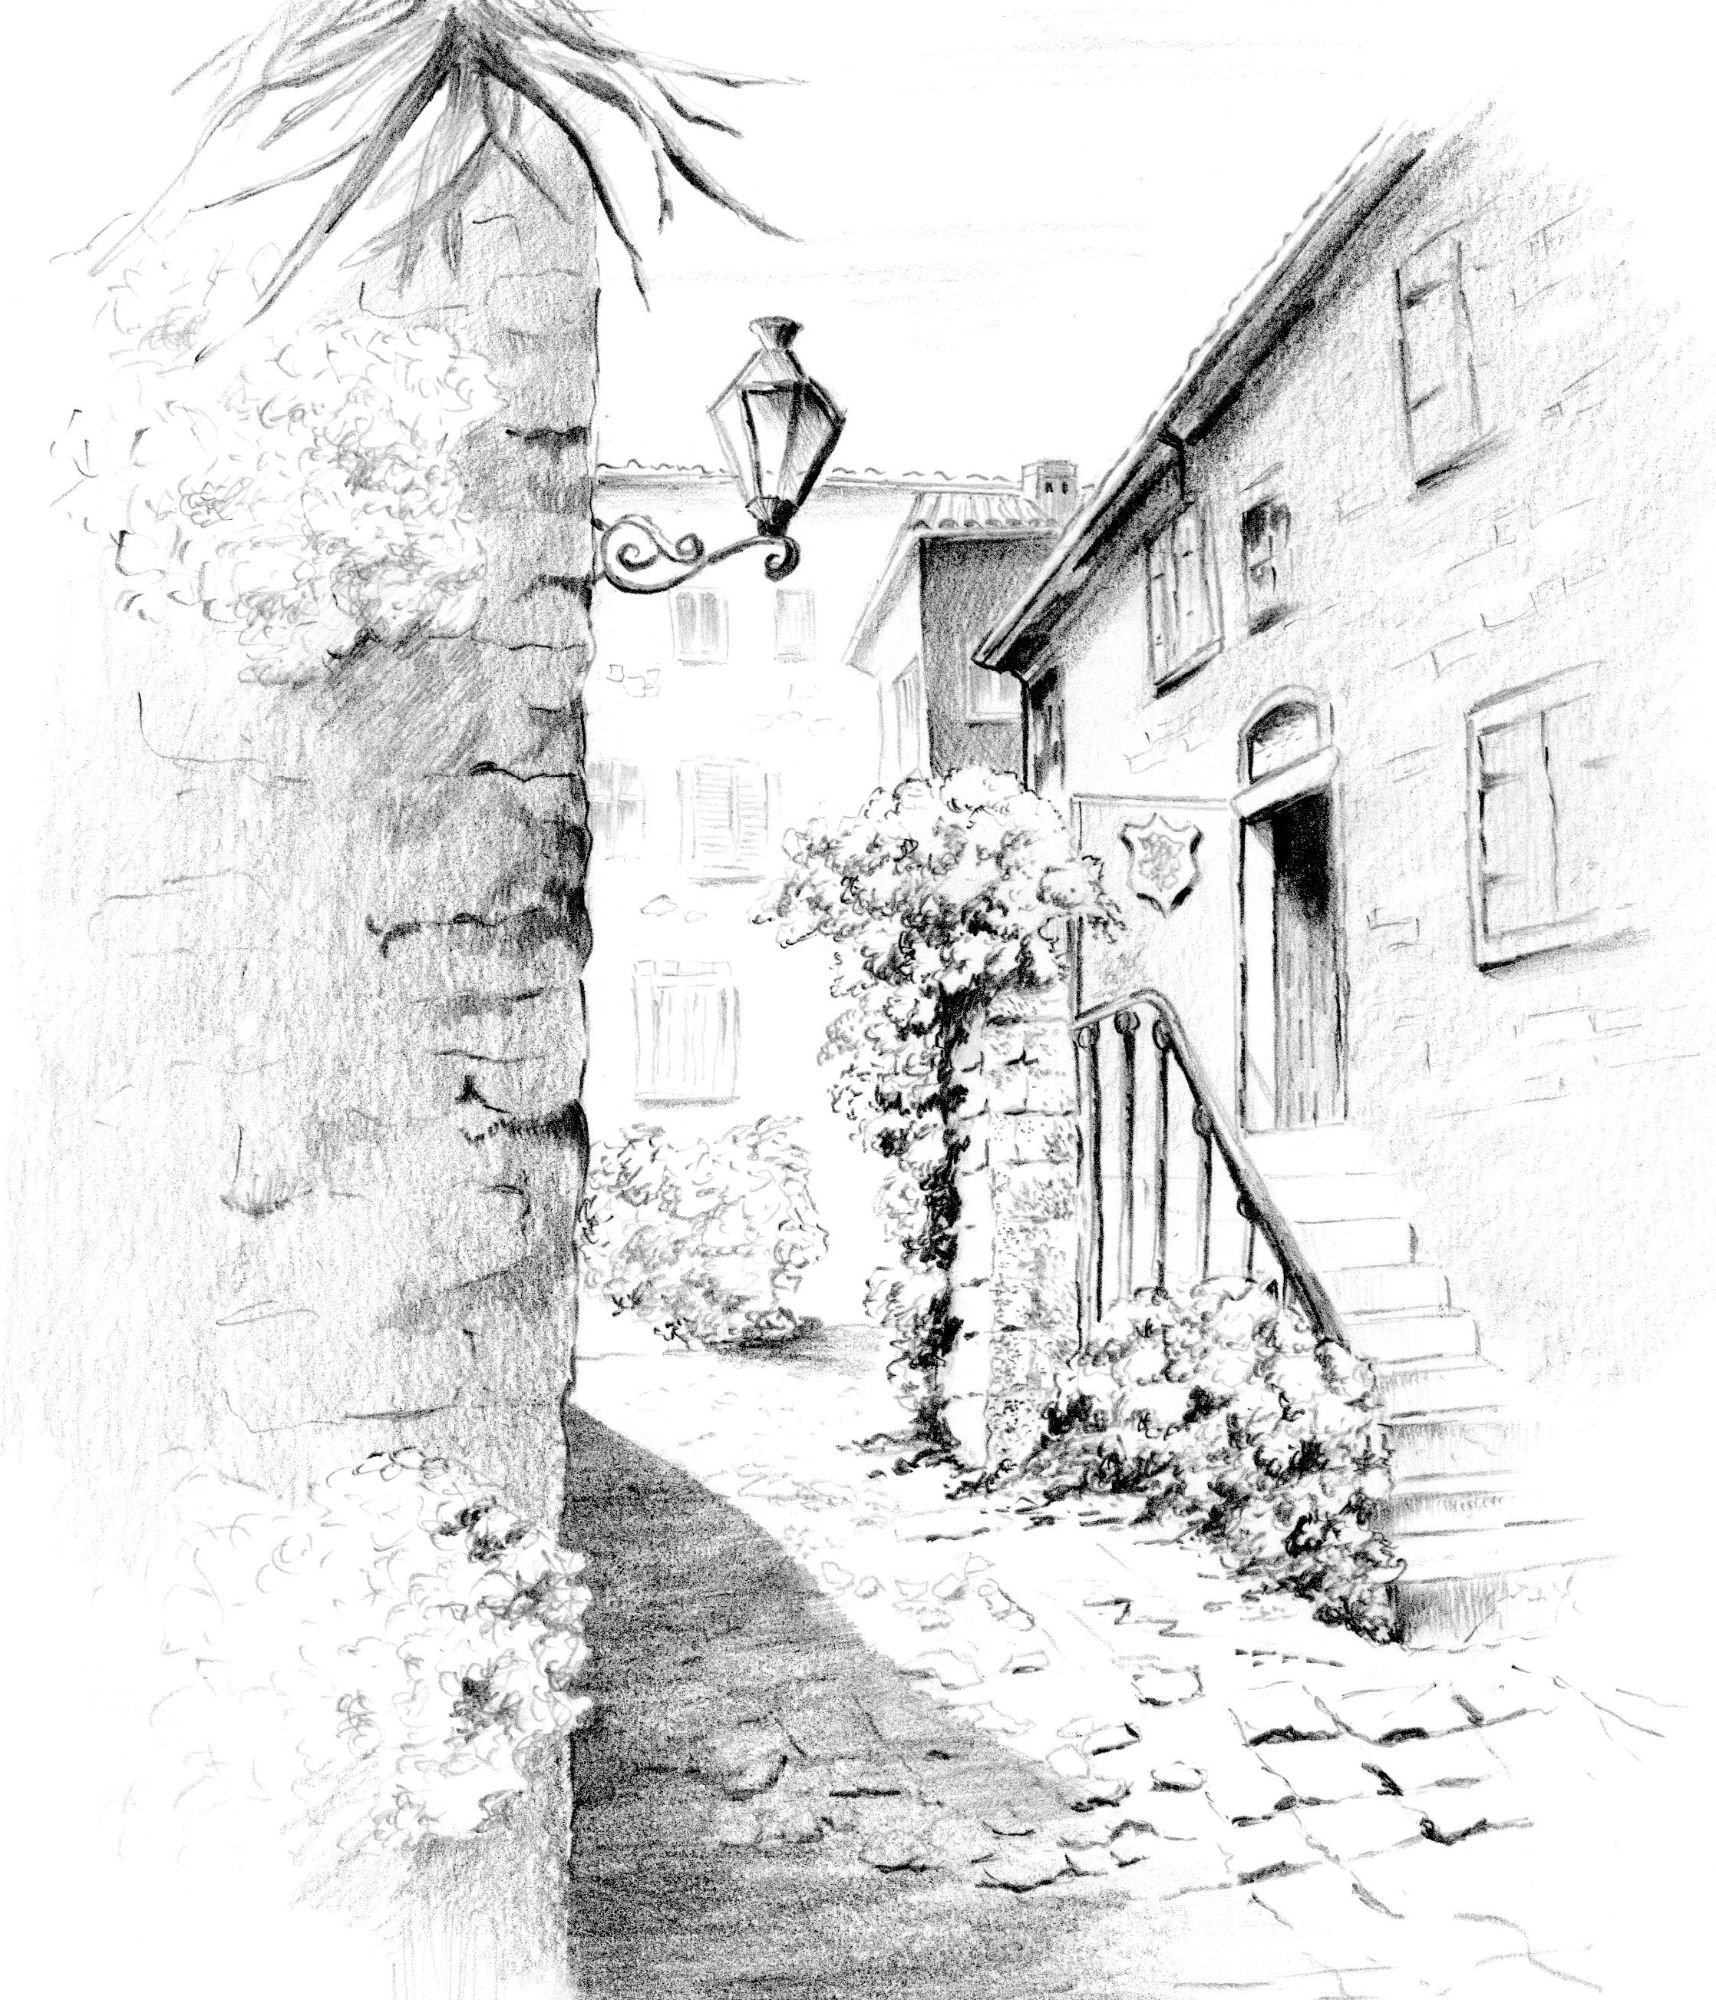
People are often worried about starting a picture. What comes first, where do we place certain items, what about scale and perspective? When starting a drawing, look for overall shapes within your subject. Draw the biggest shape first, then the next biggest and work inwards from there. This is called "drawing from the outside in". It is so easy to get caught up in fine detail, only to find that we have run out of paper, or the drawing sits awkwardly on the page making the work look unbalanced. Look at the photograph on the left. This looks a very complicated picture. It absolutely is. I just wanted to use it as an example. However, when you break it down into parts, it becomes easyier. I have drawn coloured lines around the shapes you would start with. The largest shape is the red box; the second largest is the yellow box and so on. Putting in the detail will come right at the very end as you gradually work your way from larger to smaller.
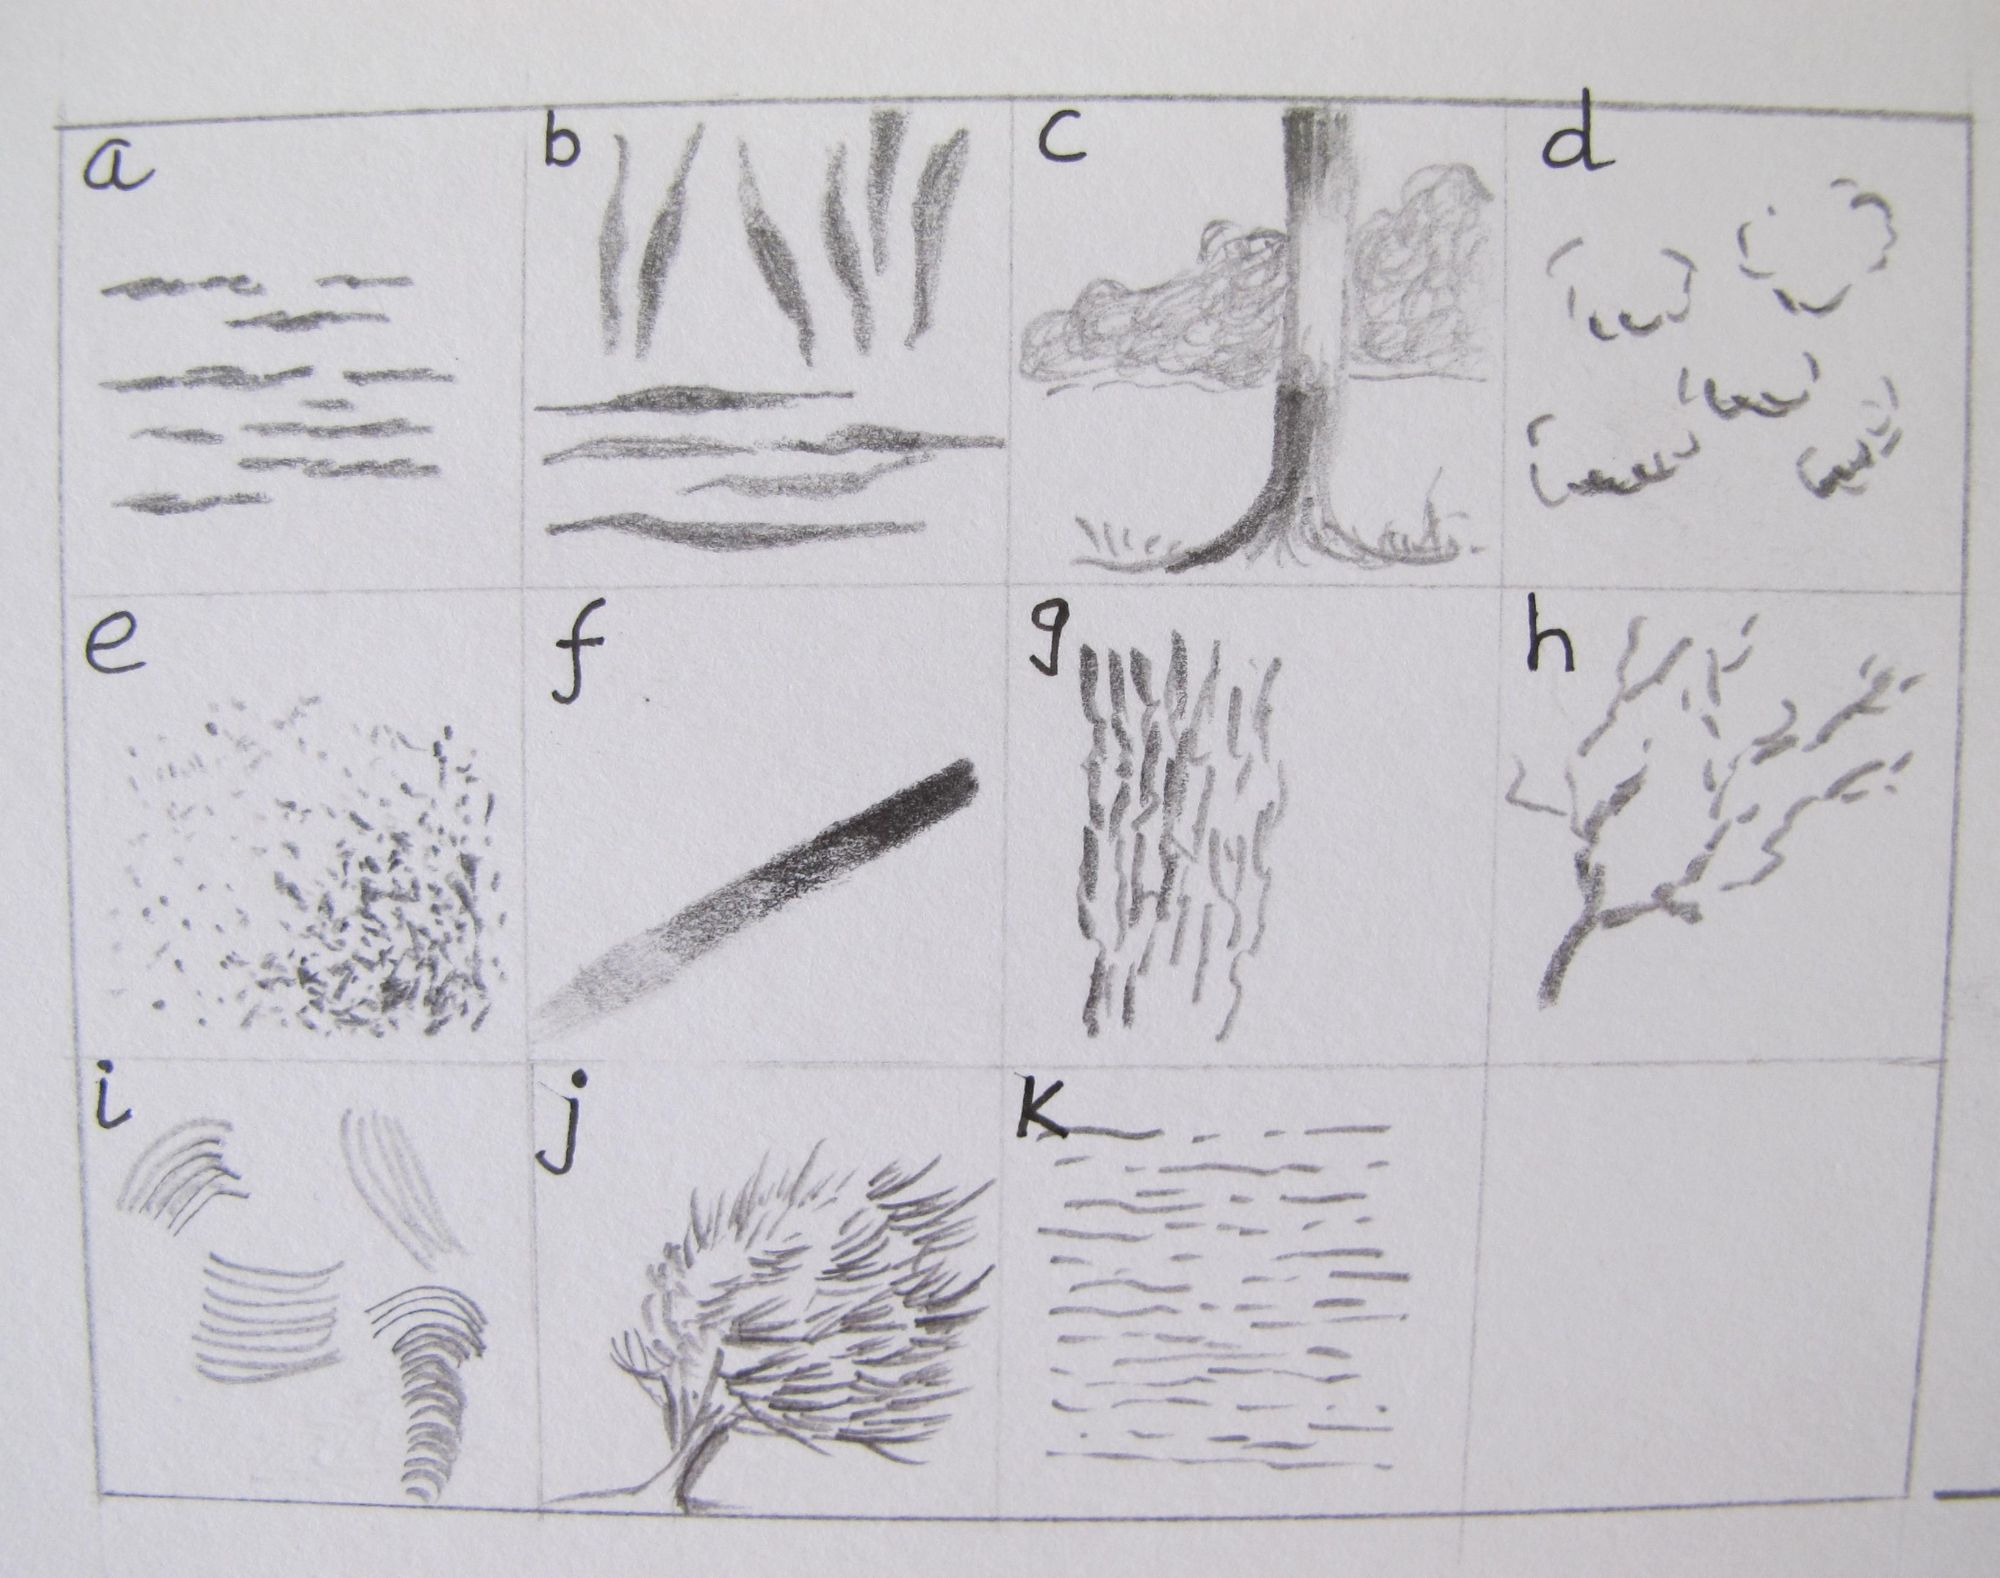
The illustrations on the right show you a few different shading marks that can be used to depict various textures and surfaces
This is not an exclusive list but will be enough to use for the time being.
The thick and thin line marks in (a) and (b) can be used for the fur patterns on animals, horizontal ripples in water, or rough tree bark. (c) was drawn with an HB pencil in the background and a 6B in the foreground. The squiggles in (d) could be clouds or fur. Stones, rocks and bricks can be shaded using 6e (dot stipple), this will suggest their rough texture. Tonal values can be seen in (f) using all the pencils in order of their degree of softness. Broken lines in (g) and (h) could be tree bark or branches. The possibilities are endless. Just use your imagination but try if possible to follow the contours of the objects you are shading. Drawing does not have to be complicated. Keep it simple and just draw lines that suggest form and texture. Leave something to the imagination!
Drawing with graphite pencils is a wonderful hobby. Remember these things:
Sketchbooks can be large or small - your choice.
Keep trying to draw the things you are not so good at. You will soon get to grips with it.
Start with the big shapes and move gradually towards the details.
Draw quickly, don't fiddle!
Use your sketchbook as a reference. Draw any little thing that takes your fancy. You never know when you will need it in the future for reference.
For a recommended book on sketching, go to my books page
I hope this very short introduction to using graphite sketching pencils has inspired you to 'give it a go'. It's probably one of the most economical types of art you can think of. You have probably already got most of the materials you need.