
Water-soluble graphite
I absolutely love this drawing medium as it is so versatile. It is the perfect combination between drawing and painting.
The materials I recommend are highlighted in green
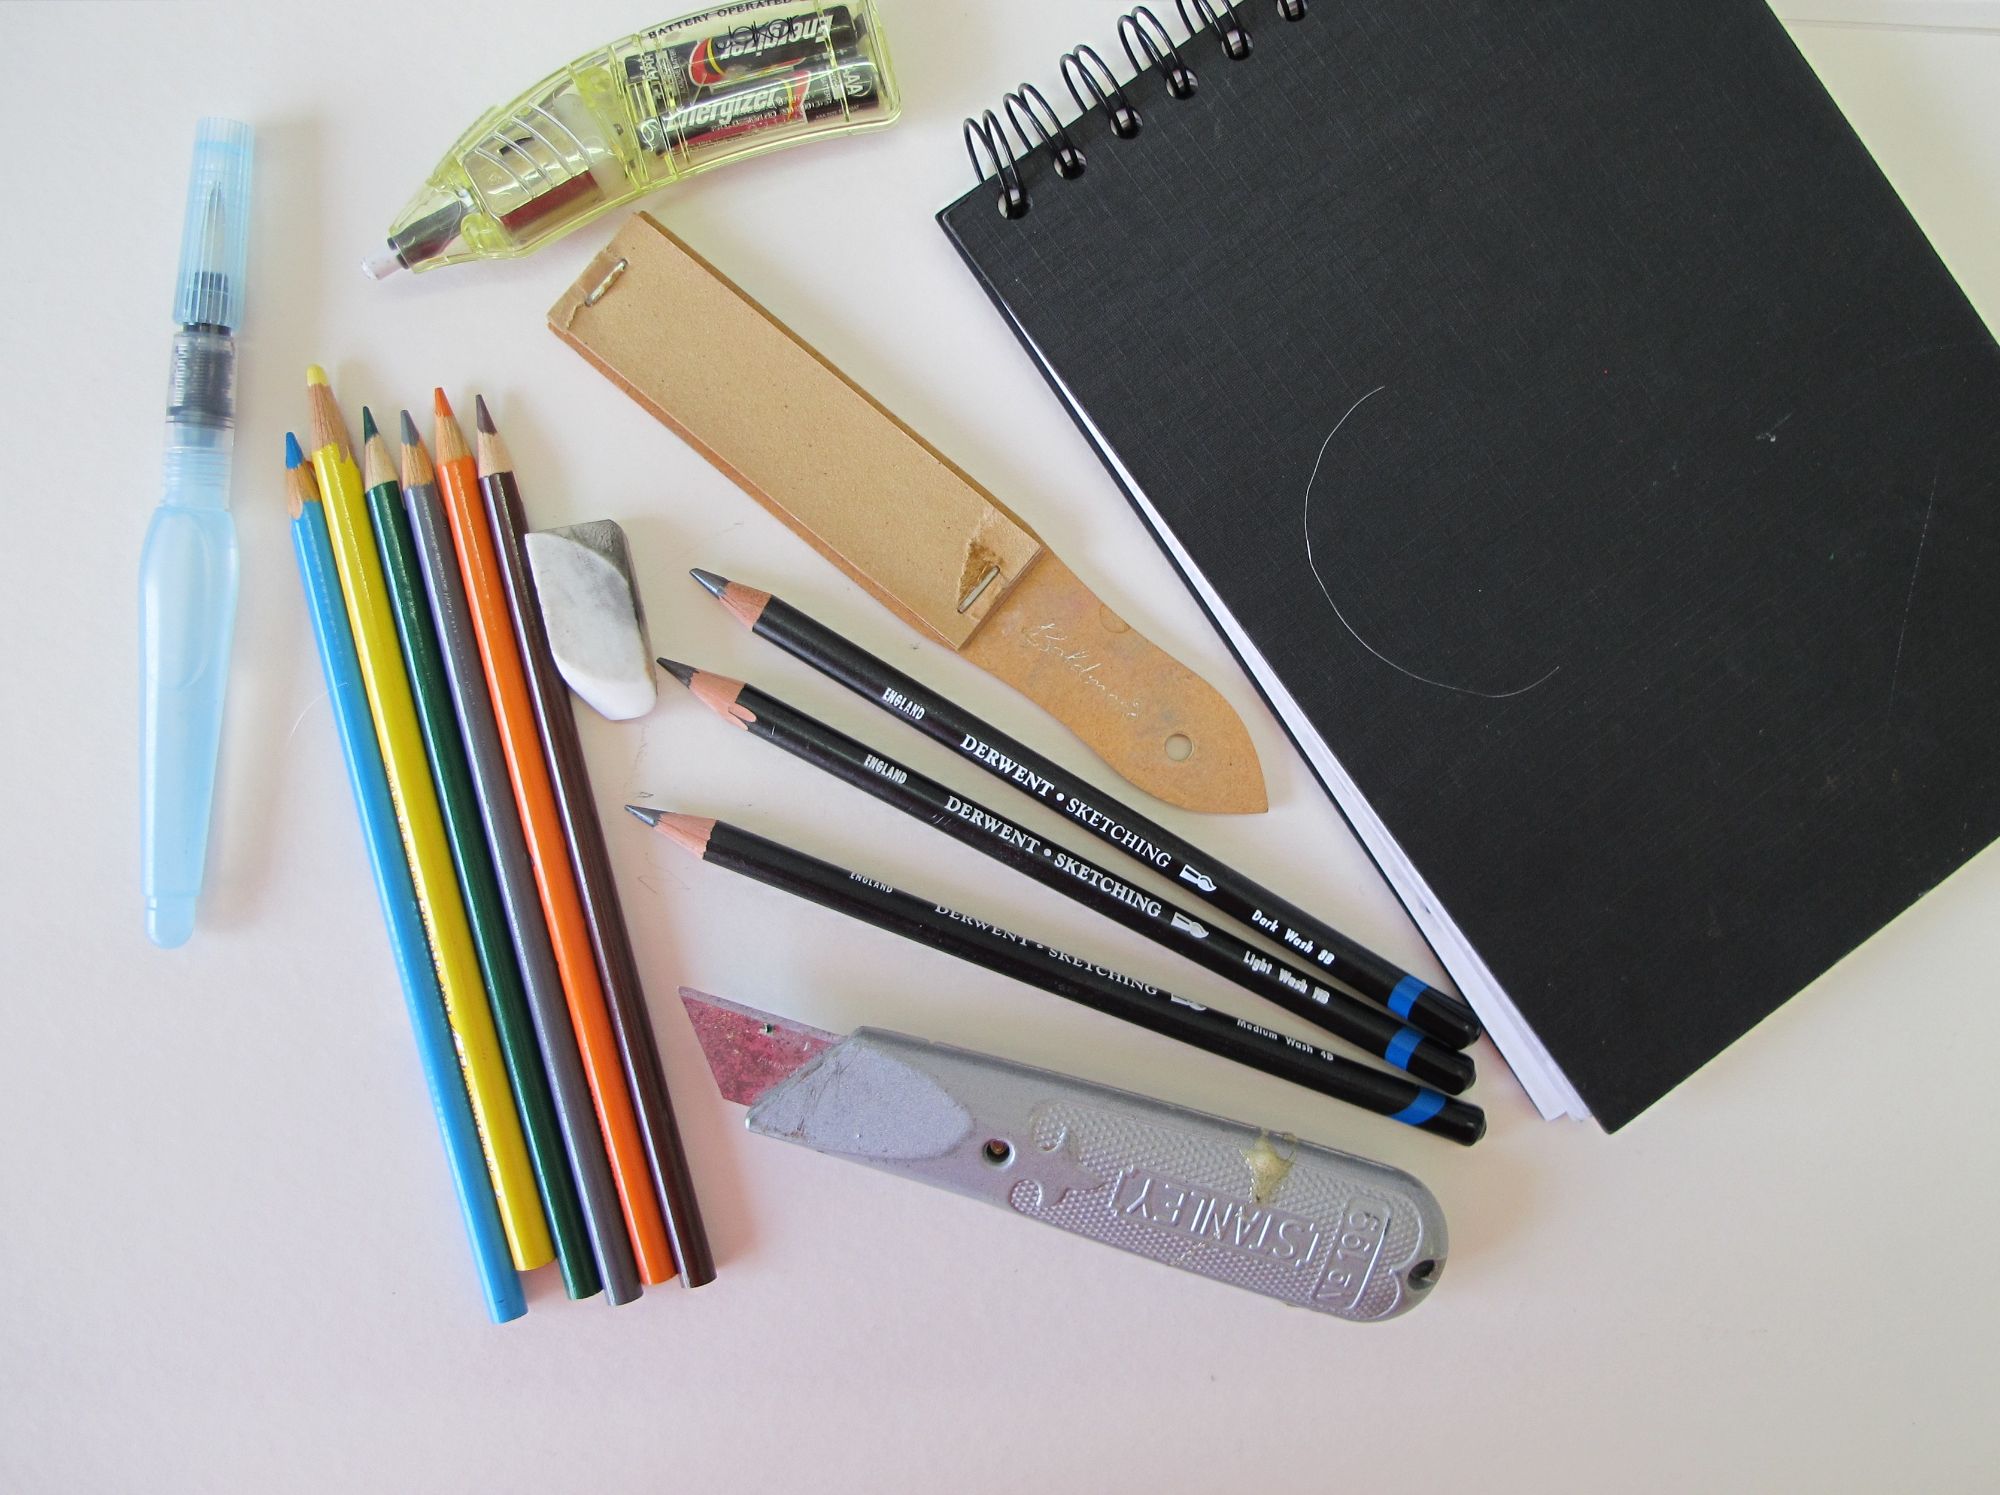
This is such an exciting medium. Here are the only materials you will need. Water-soluble graphite comes in various forms: pencils, pots and sticks. It's purely down to choice. The graphite works in the same way whichever materials you choose. However, we will just look at the water-soluble graphite in pencil form. Similarly to ordinary everyday graphite sketching pencils, we don't need to purchase very many. In fact just three are quite sufficient. A light wash, a medium wash and a dark wash. I have chosen the Derwent pencil set, as you get two of each pencil in a tin. The water-soluble pencils are graded according to their degree of softness (blackness). You will need a sketchbook or sheets of paper that will cope with a small amount of dampness, a water brush, a soft putty rubber and a palette. You could also add some watersoluble coloured pencils.
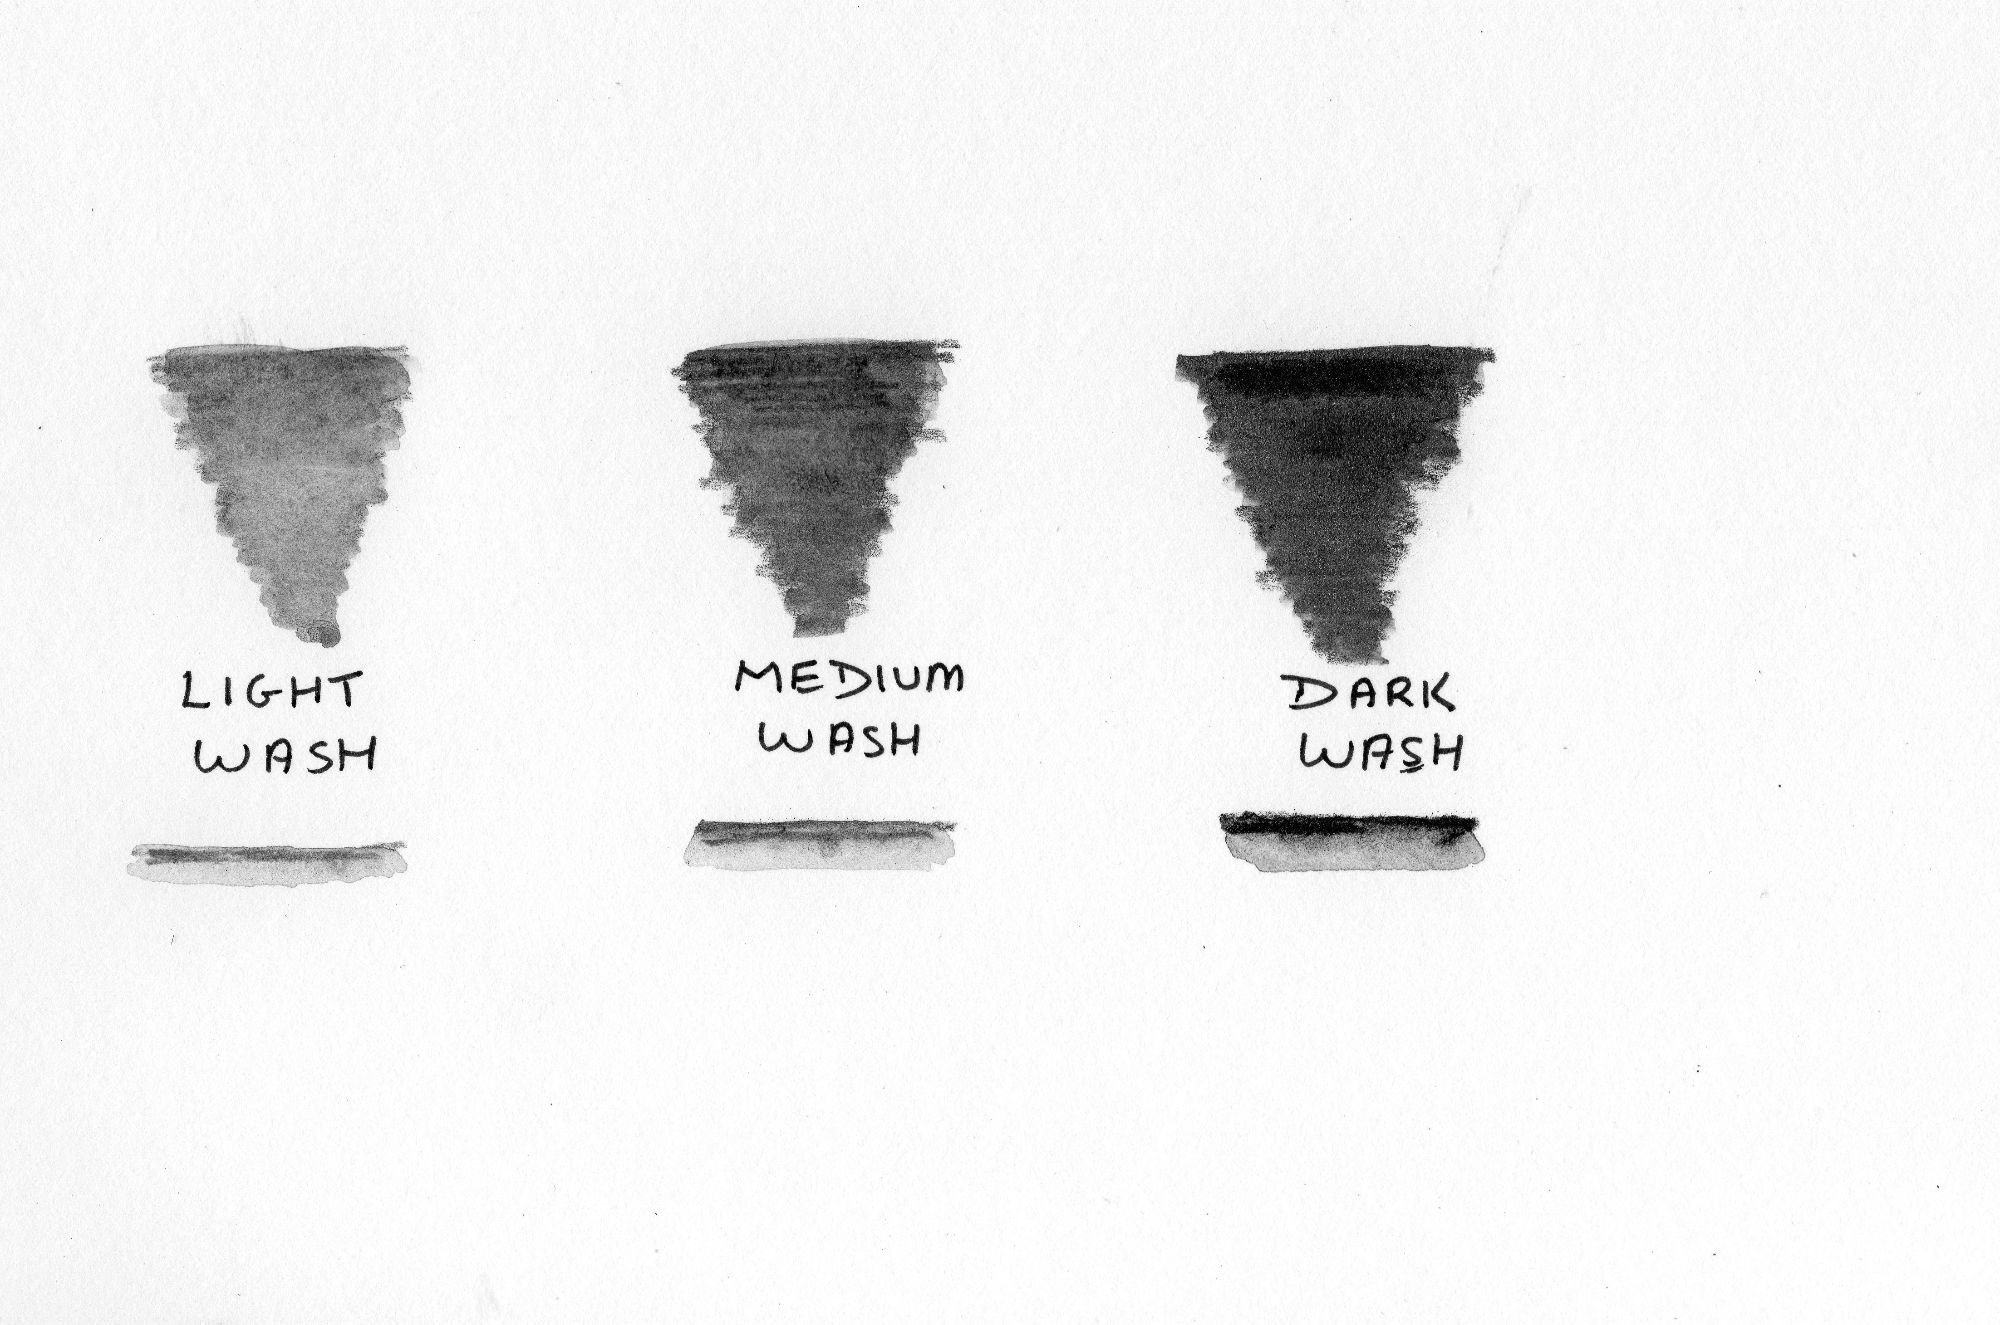
Here you can see the difference between the light, medium and dark wash pencils. The original pencil marks look exactly like ordinary graphite marks when you first draw with them. However, when you wet your drawing with water and a brush, the graphite moves like watercolour. If you want a very softly shaded area with no line showing, use a watercolour brush or a waterbrush pen (see below) to take the graphite directly off the tip of the pencil. Alternatively, scrape a few flakes into a palette, wet them and use the mix like paint.
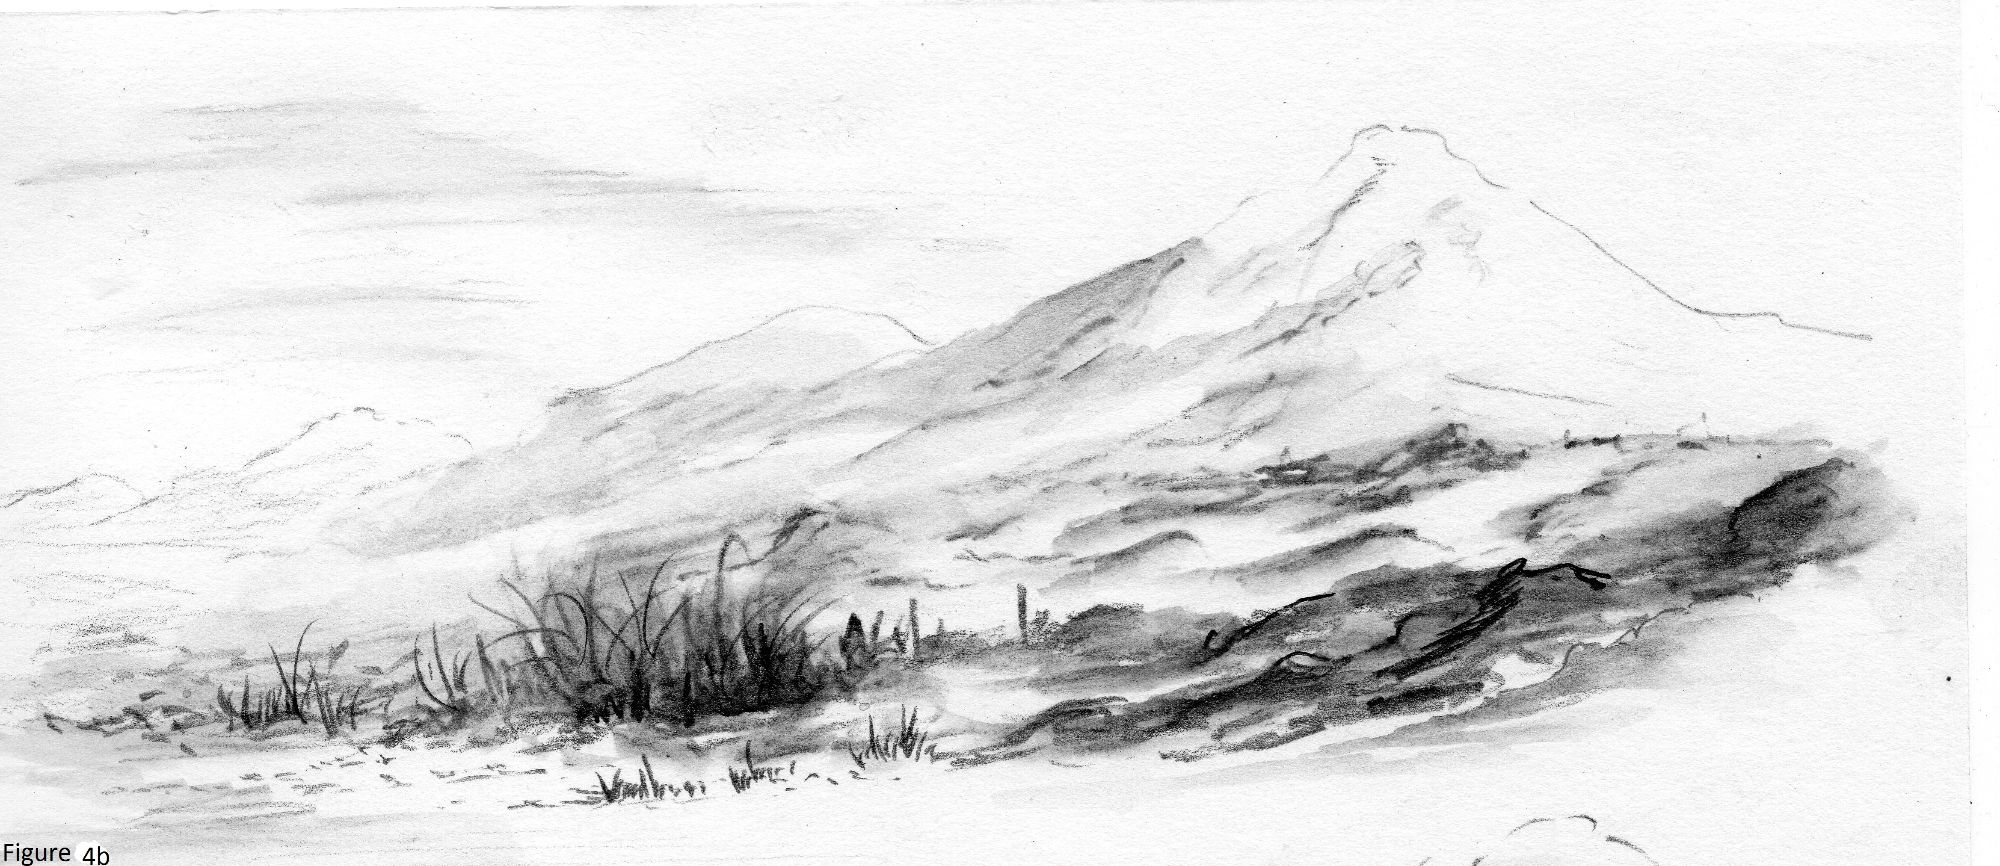
When you make your sketches or drawings, you don't have to wet and blend every line. Leave some marks as they were when first drawn. Start with a soft outline and the first layer of shading using the light wash pencil. Wet your lines and blend where needed. Remember to leave any areas that you want to show as white paper for highlights. Let this layer dry completely. Now go over your work again with the medium wash pencil to add more contrast. Let this layer dry. Now use your dark wash pencil to punch in some strong contrasts where needed. Look at the image on the left. This shows you a very simple little sketch using all three pencils. Some lines have been blended with water and some have not. Always lay down less graphite than you think you need, you can easily add more. Using various shading patterns in our drawings can prove problematic. When using watersoluble pencils, it is not easy using these shading patterns on areas where you intend to add water. The water will just make all the lines run together. Therefore, the main method of shading with this medium is one of blending light to dark and dark to light. Once again, because we are only using one colour, tonal values are paramount. If you want to add some additional textures and details to your picture, this can be done at the final stage using the pencils in their dry form.
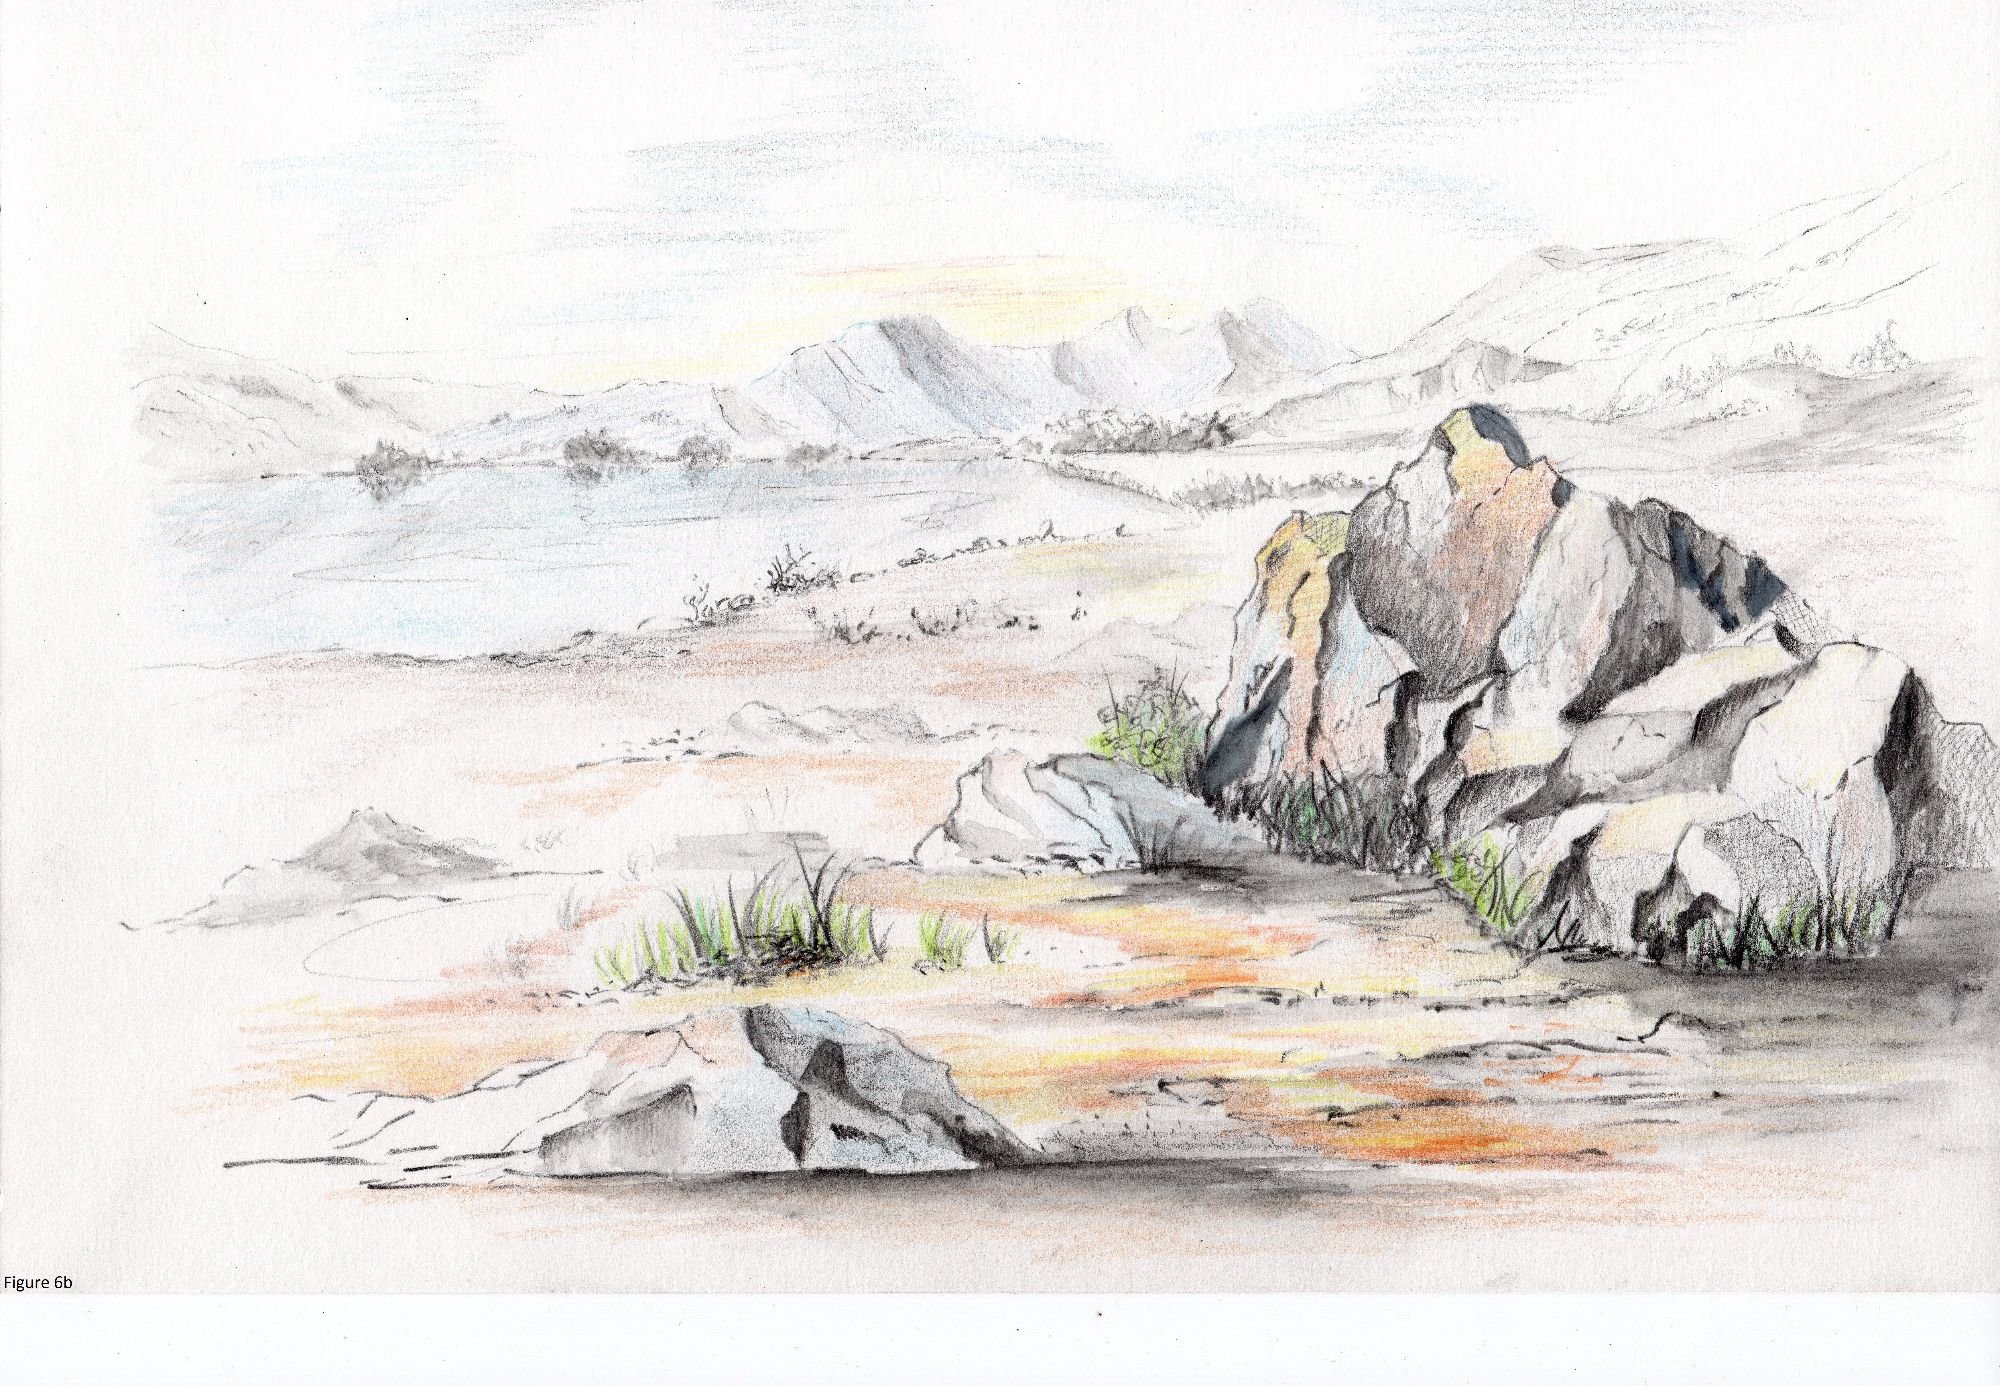
These two drawings were both done with watersoluble graphite. The second picture was tinted with ordinary coloured pencils. If you want to add colour to your drawings, remember not to use watercolours as wetting your paper will ruin your drawing! If you want to go one step further, Derwent have introduced sets of watersoluble graphite pencils in lovely subtle colours. Practice with your basic pencils first, then maybe progress to these coloured ones later
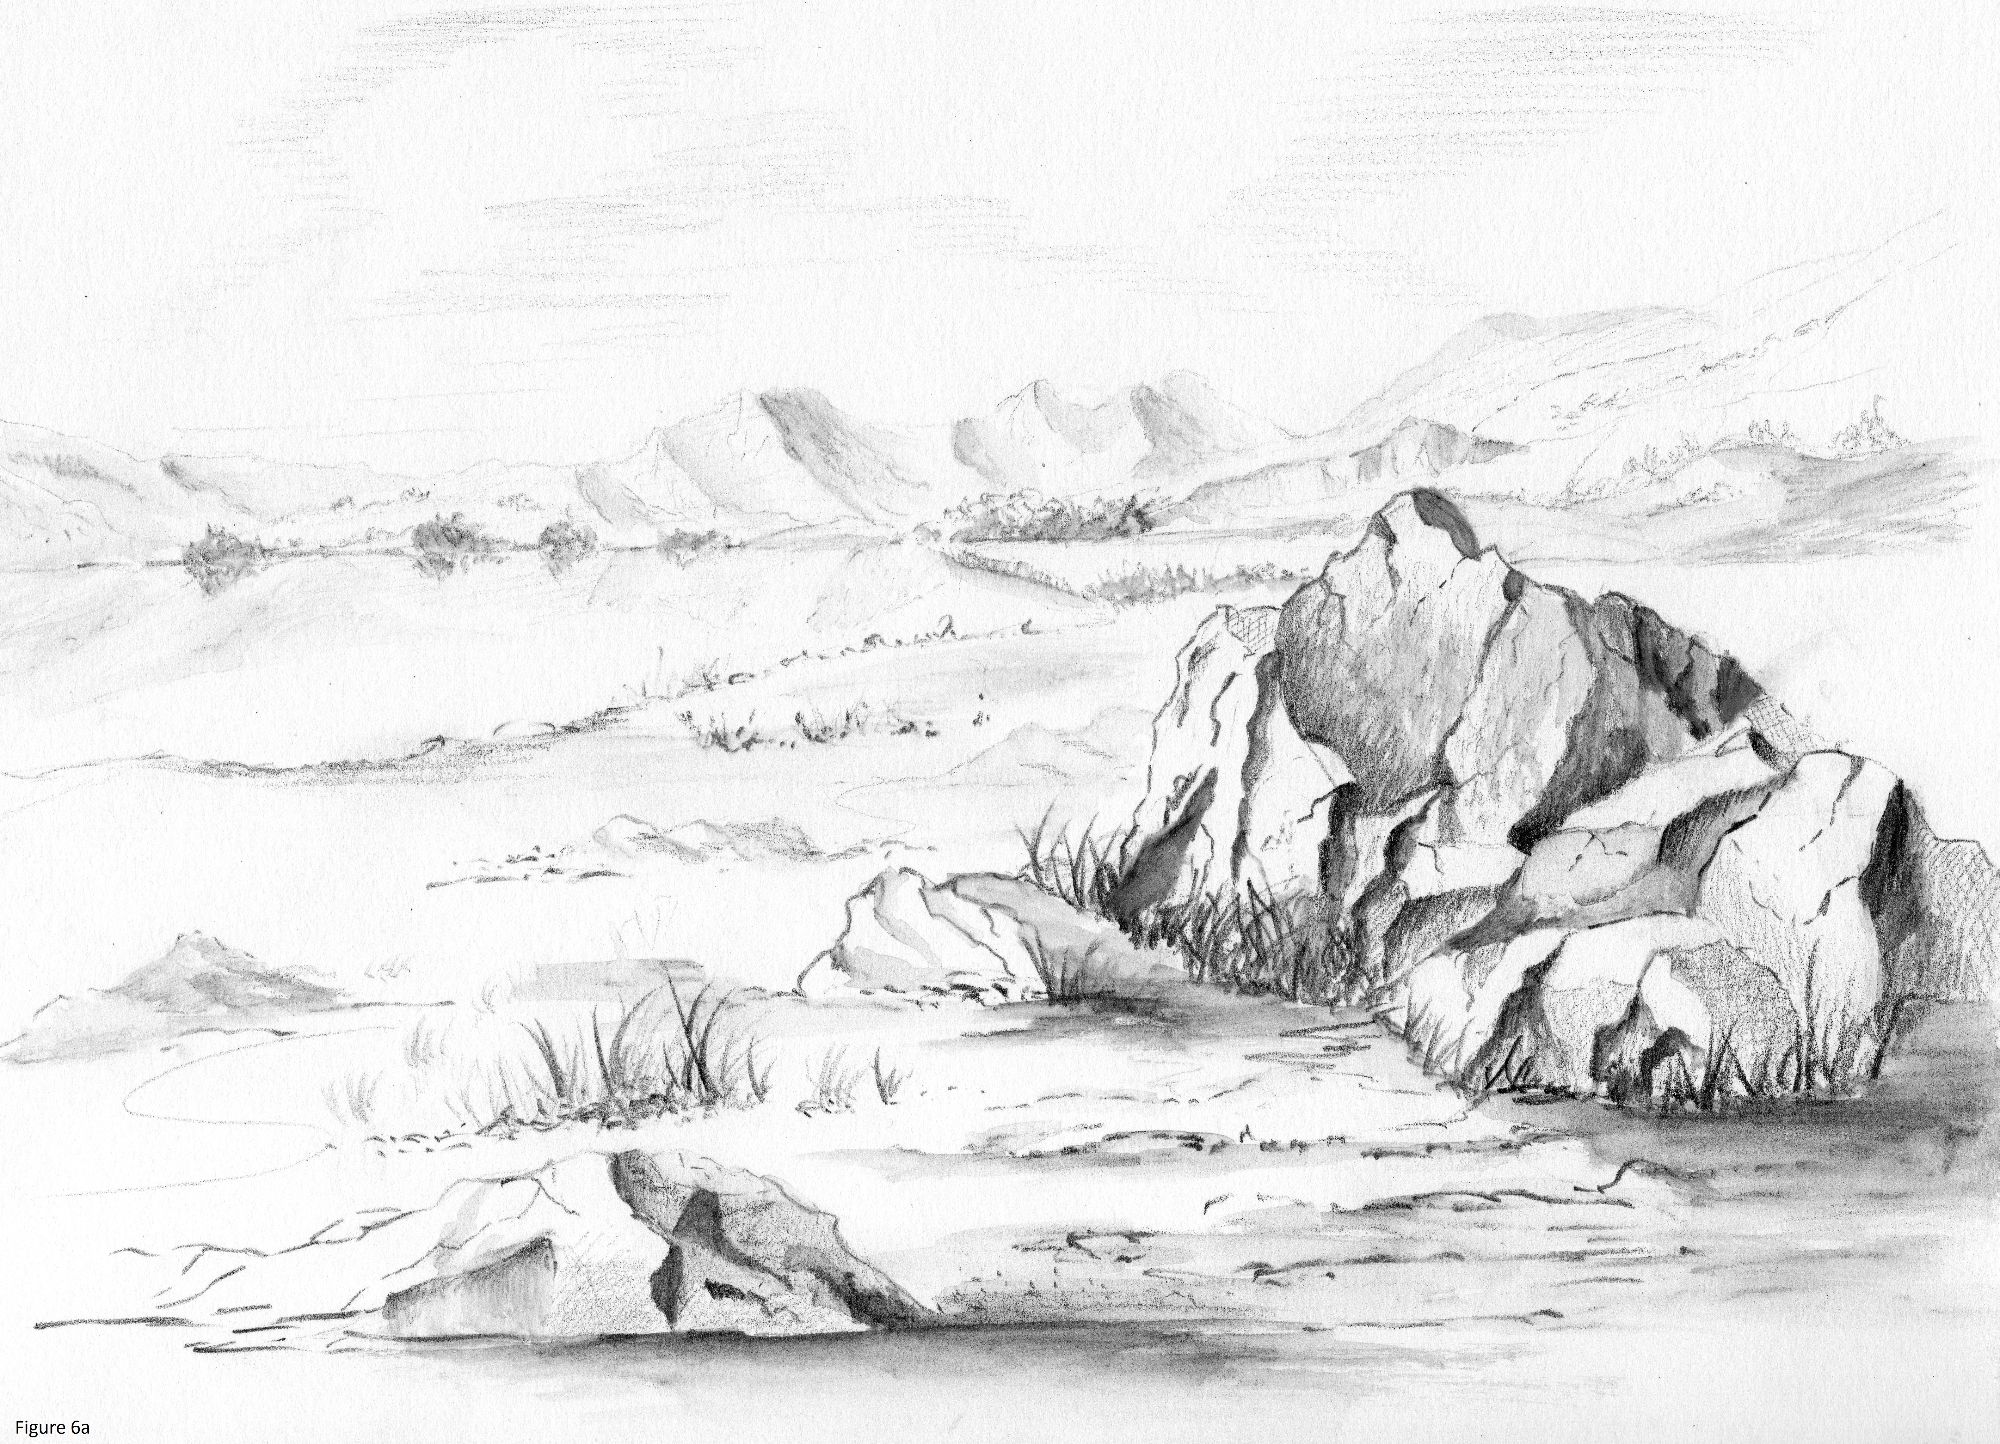
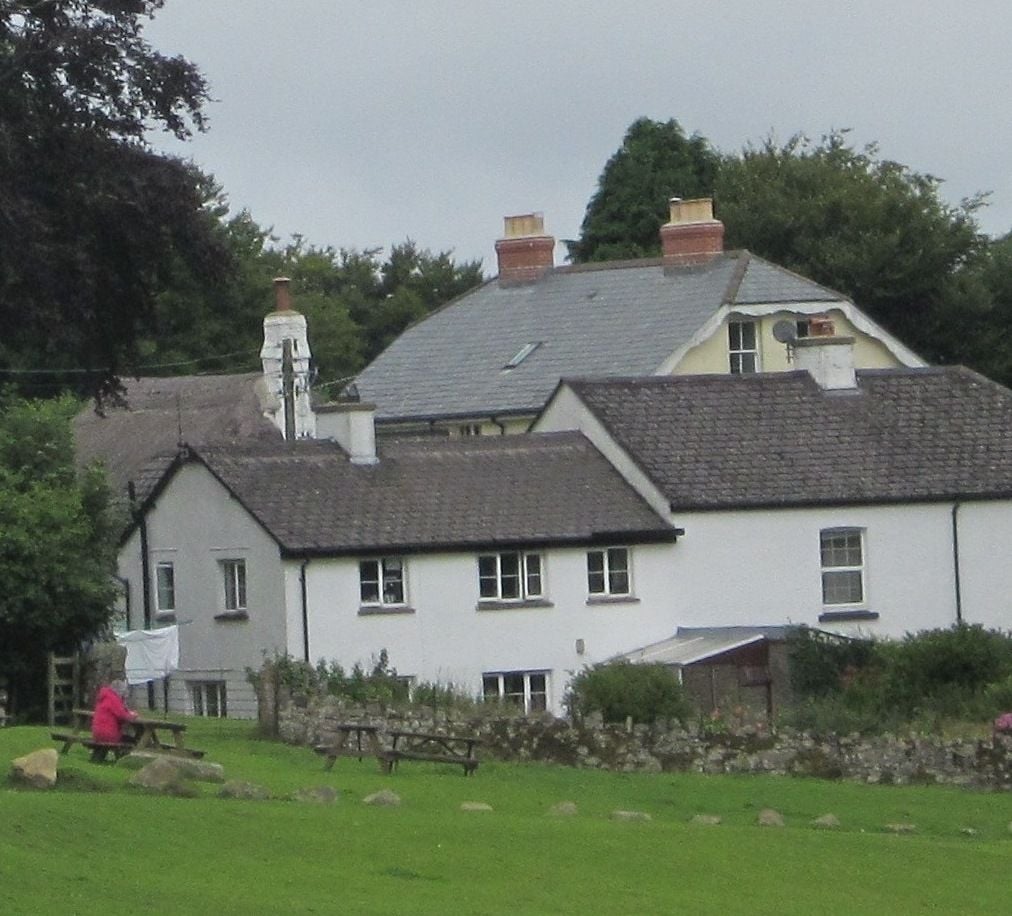
This is a photograph of a house in a little Devon village. I have changed a few things to make the overall picture more aesthetically pleasing. I left out the rather complicated roof on the left side. I did not think either the seats or the washing on the line were necessary. I enlarged the tree foliage behind the house to make the chimneys stand out against the dark foliage. I started with the light wash pencil, scraped little bits into a palette, made them wet and painted on a foundation layer. You can see this in the picture on the right.
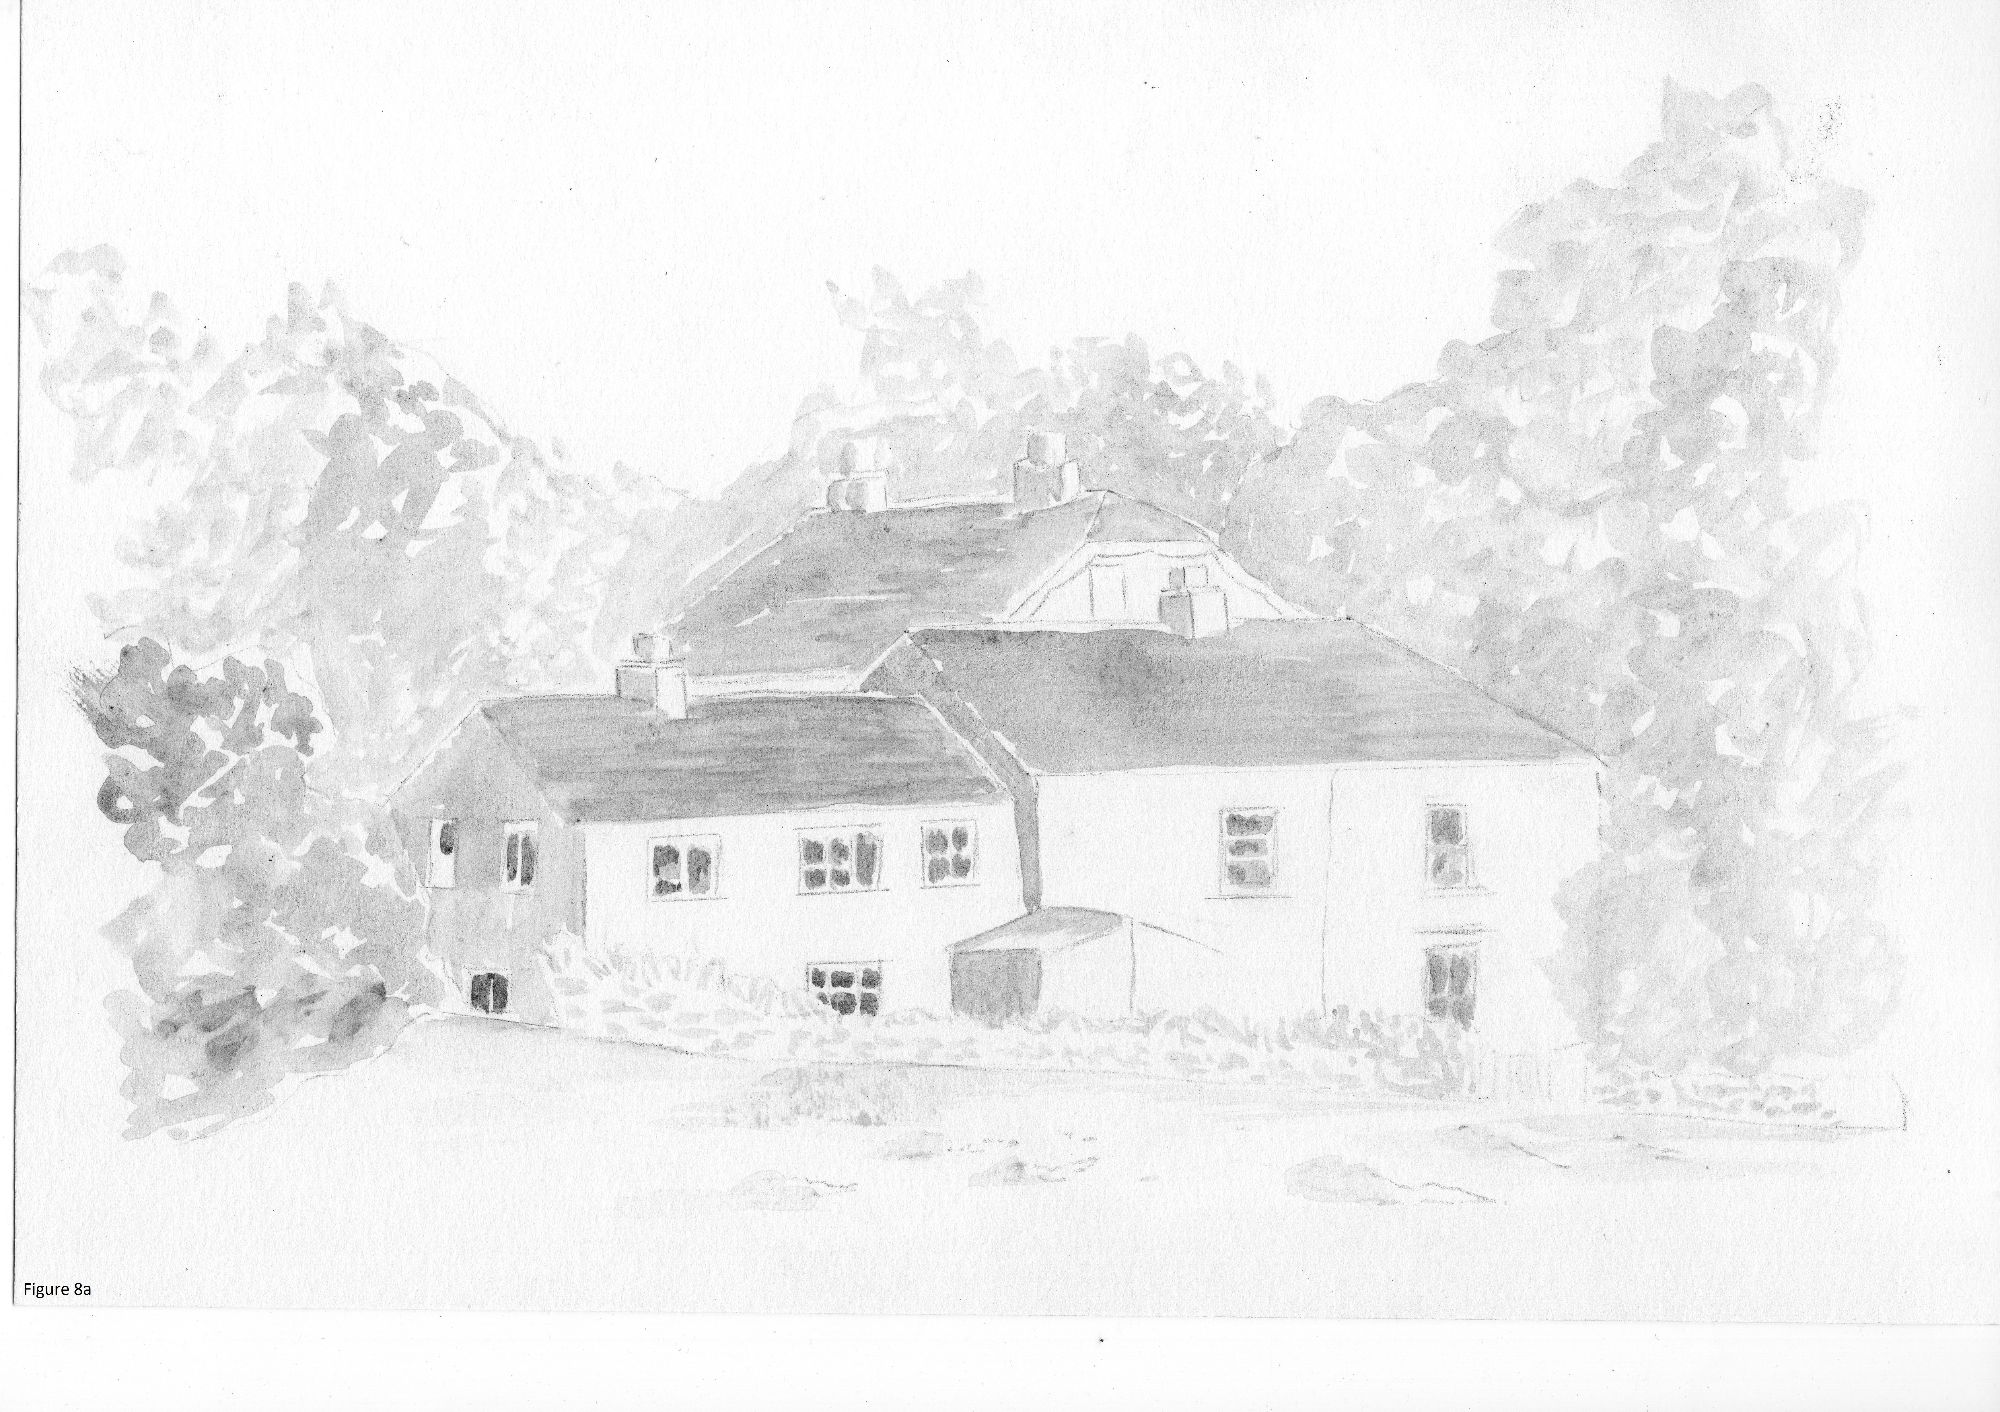
I then used the medium wash pencil, wetting it in some places but not othes. Next I used the dark wash pencil to punch in the dark shadows. Some parts I made wet, others I left alone. The medium wash pencil was then sharpened and some additional texture lines were added to the drawing and left as dry graphite. Think about putting darks against lights and lights against darks (counterchange). Remember to build up the tones by letting each layer of shading dry before adding the next one. You can add as much detail as you wish by using your pencils in their dry form.
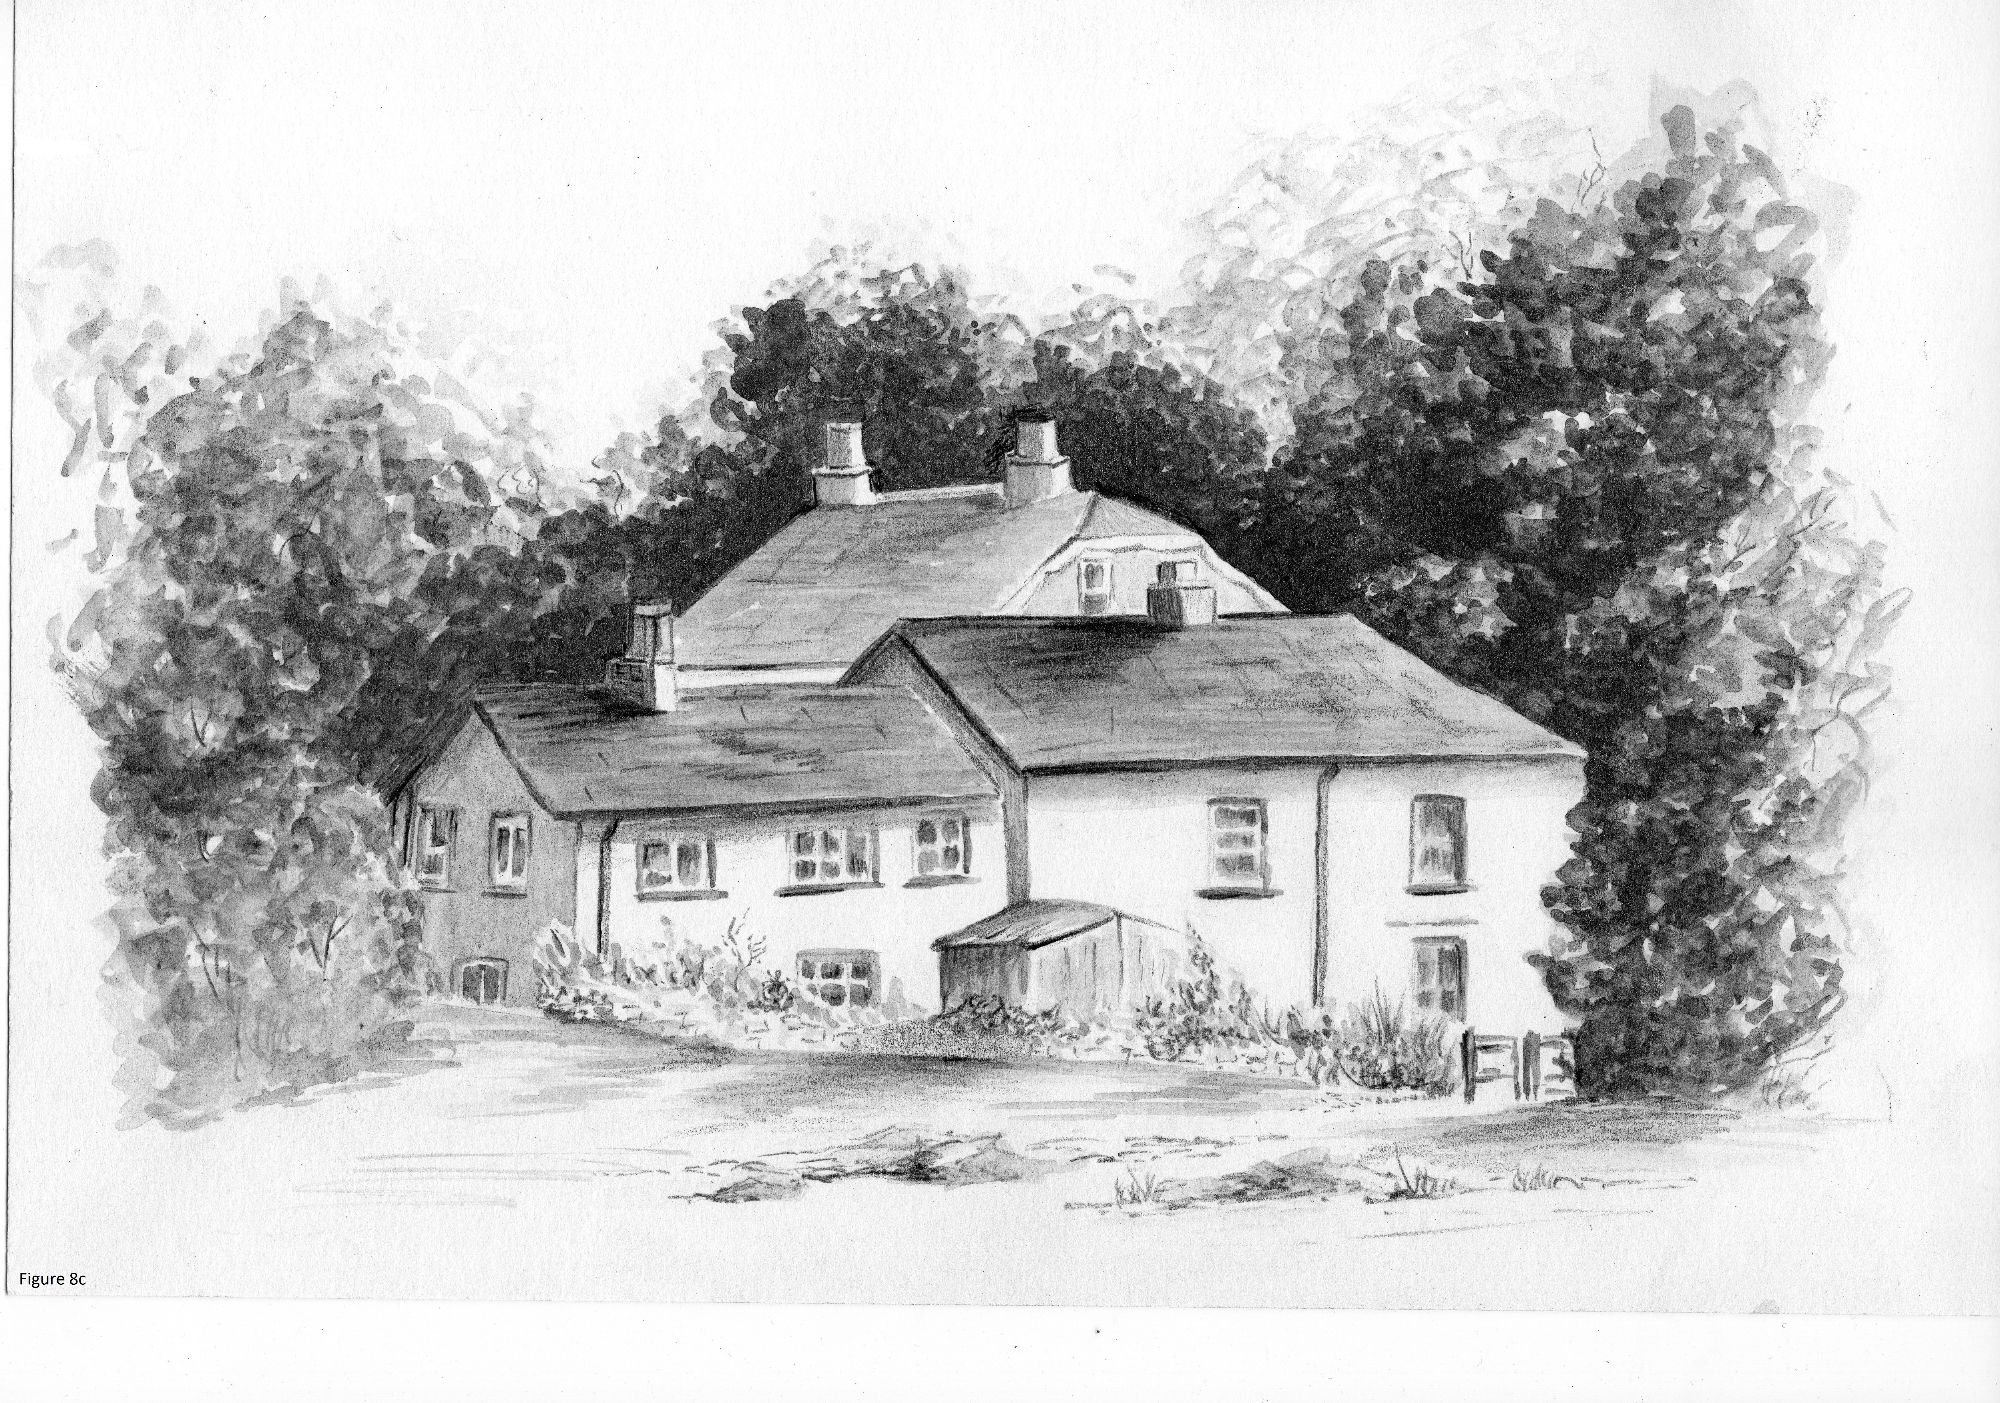
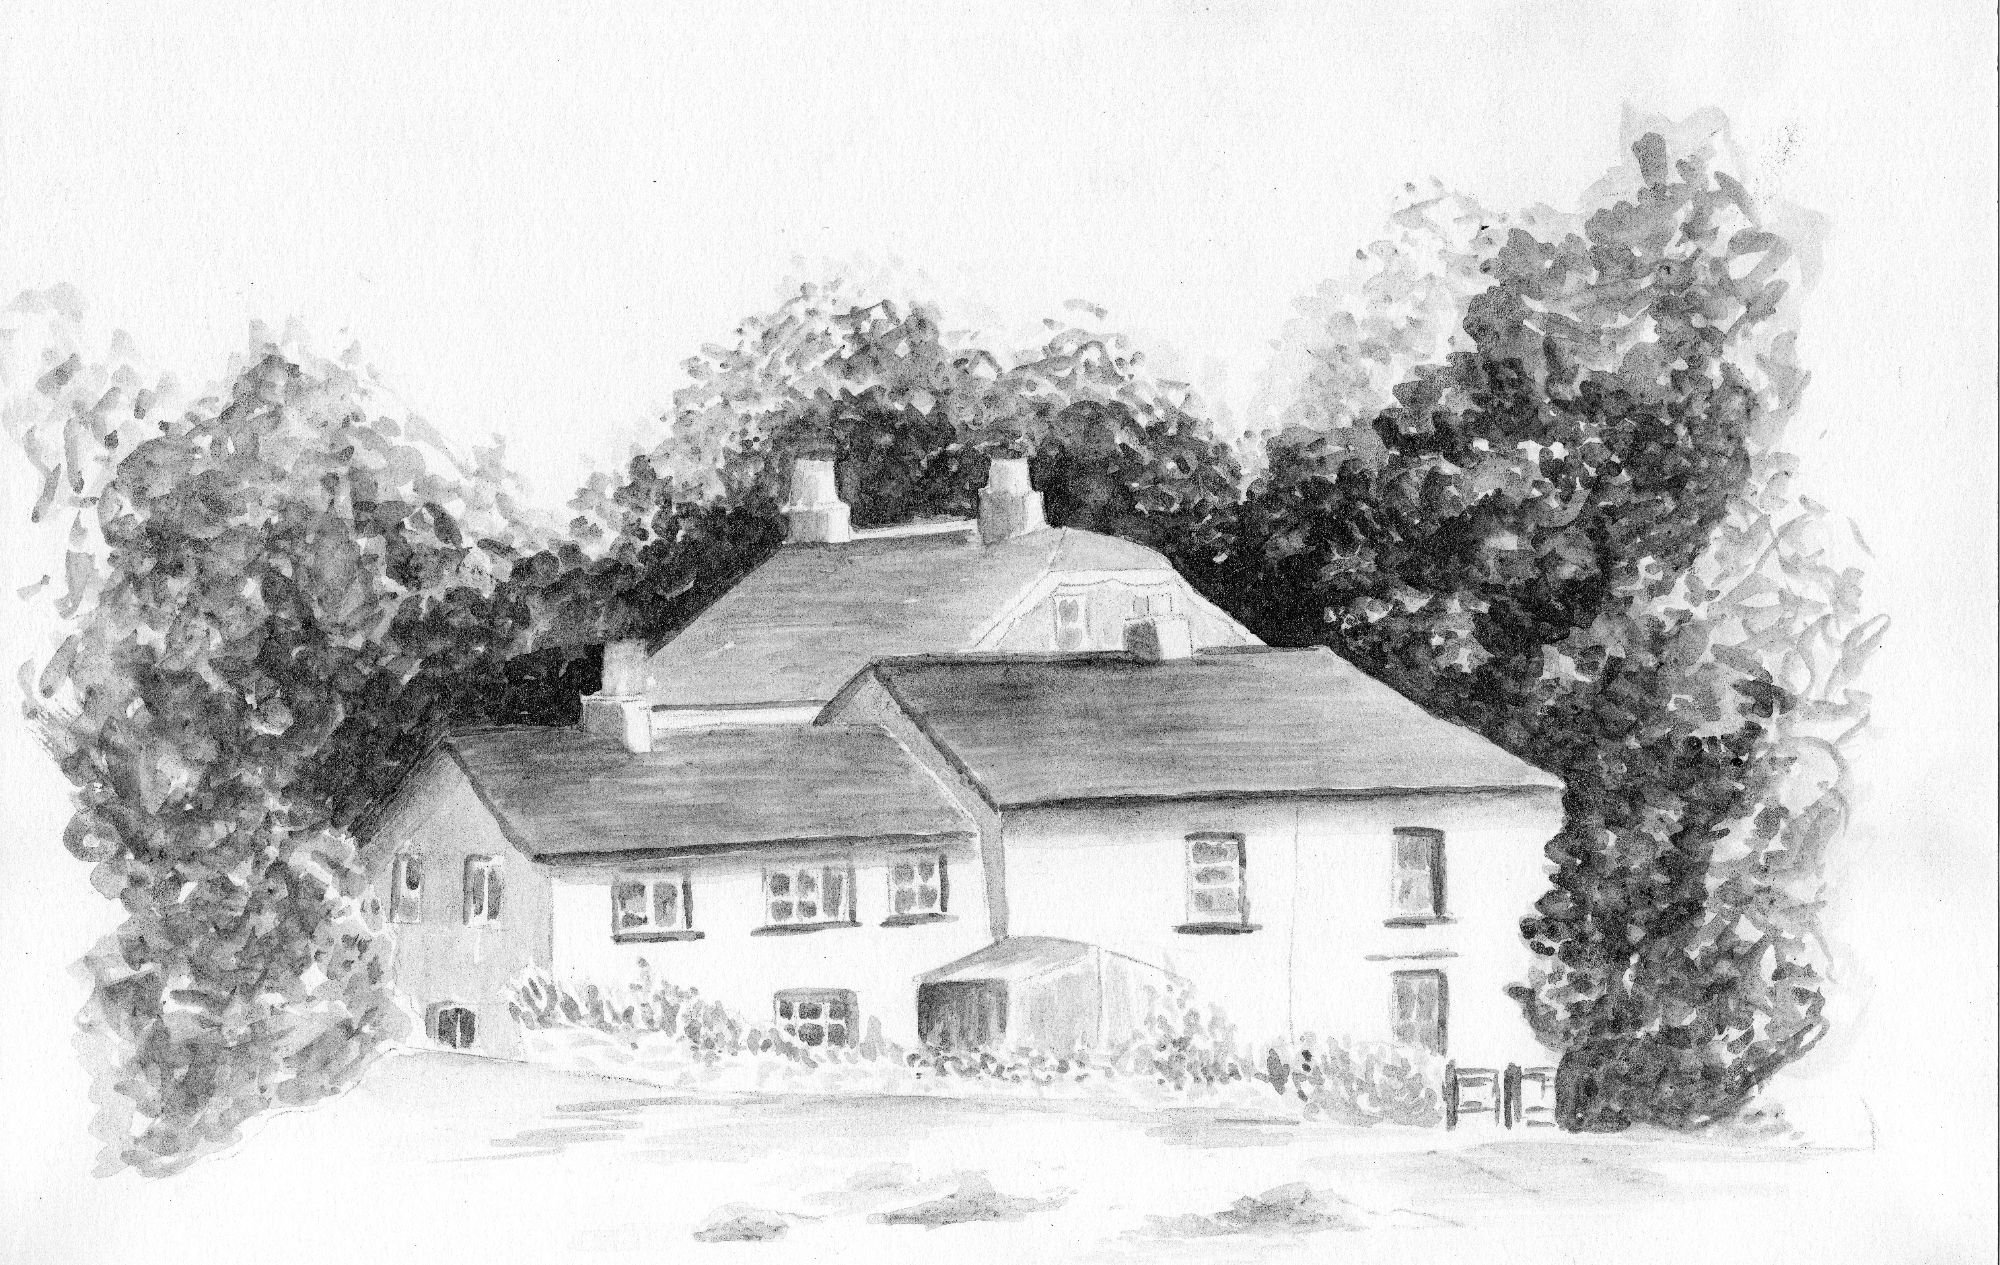
Here is the final picture. See how the darks against the lights
and the lights against the darks (counterchange)
really make the picture shine with contrast.
The results you get with watersoluble graphite are quite different from those of ordinary graphite pencils. It's a matter of choice as to which you prefer. There is nothing to say you can't use both graphite and water-soluble graphite in the same picture.
Have a go and see what interesting results you can achieve. Start with a simple object and progress to a full picture.
For recommended books on starting to draw, go to my books page