Beginning Pastels. Part 2
Posted on
Beginning Pastels – Part 2
by Anne Kerr
In the previous blog, we looked at the materials we need to start painting with soft pastels. Hopefully you have now gathered everything you require and have had a go at practicing the different pastel techniques we studied.
Over blending pastels can make our work look flat and uninteresting. However, blending does have its uses; mainly for depicting distant objects, soft edges or backgrounds. A whole under painting could be done by using blended pastels, well pushed down into the paper. If you look at figure 1, you can see that just by using correct colour temperatures and tonal values in an under painting, a picture soon begins to take shape.
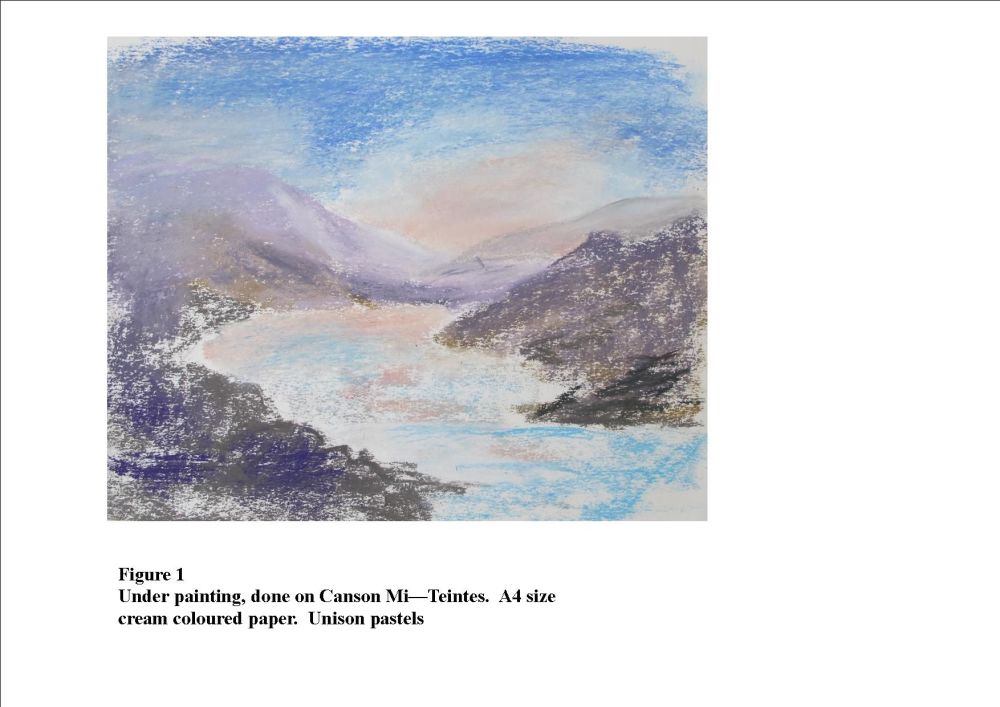
You can see that the painting in figure 1 is going to be a landscape with mountains and water! On some more robust papers, under paintings can be done with paint or ink; then, more textural pastel strokes can be laid over the top. Doing an under painting is just one method of working. Another method would be to work on each area of the painting separately using blending and textural strokes simultaneously. A third method is to put in your lightest lights and darkest darks before you begin, so you know that all the other tones in the picture will have to fall between these two. You can work from light to dark or from dark to light. Therefore, you can see that there is no one method of using pastels, it’s whatever pleases you. Experiment with them all to find the method or methods you prefer.
Look at the two trees in figure 2.
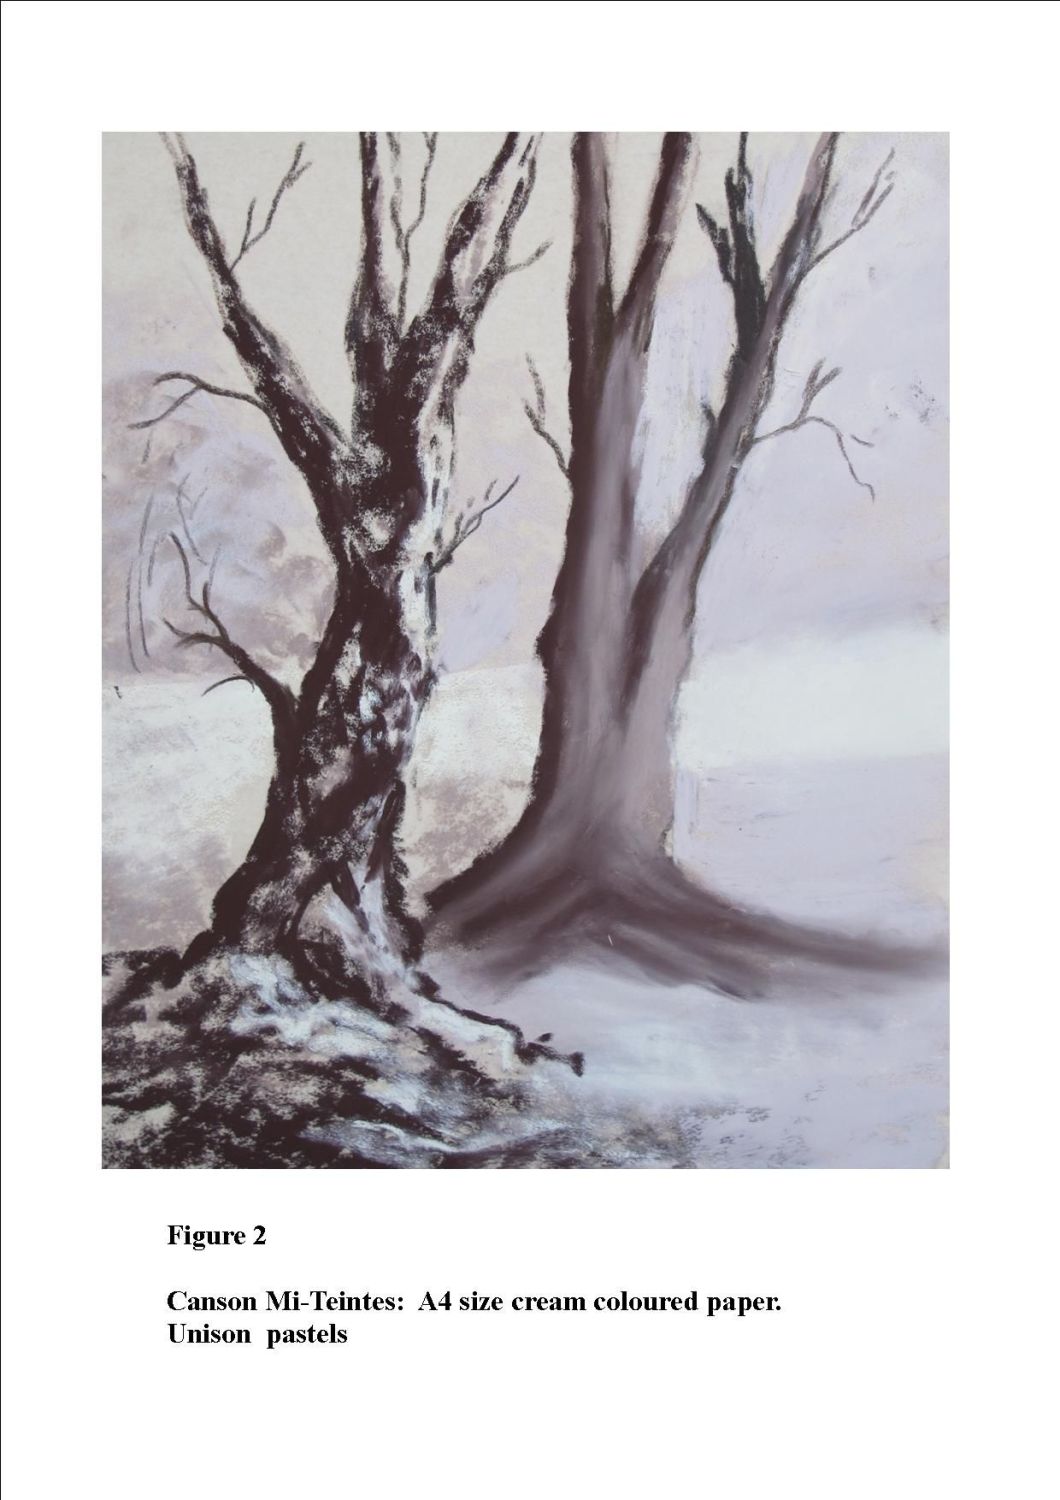
The tree on the left has plenty of texture but no blending. The tree on the right has been heavily blended. What a difference! A picture that is all blended looks very flat. Keep your blending for backgrounds, soft edges and distance. Figure 3 shows you two similar landscape pictures. One has been done with shades of grey pastel on fairly smooth white paper (Canson Mi-Teintes) and the other with shades of brown on beige colour sanded paper (Fisher 400). Just by changing the colour or texture of the paper you can get very different results
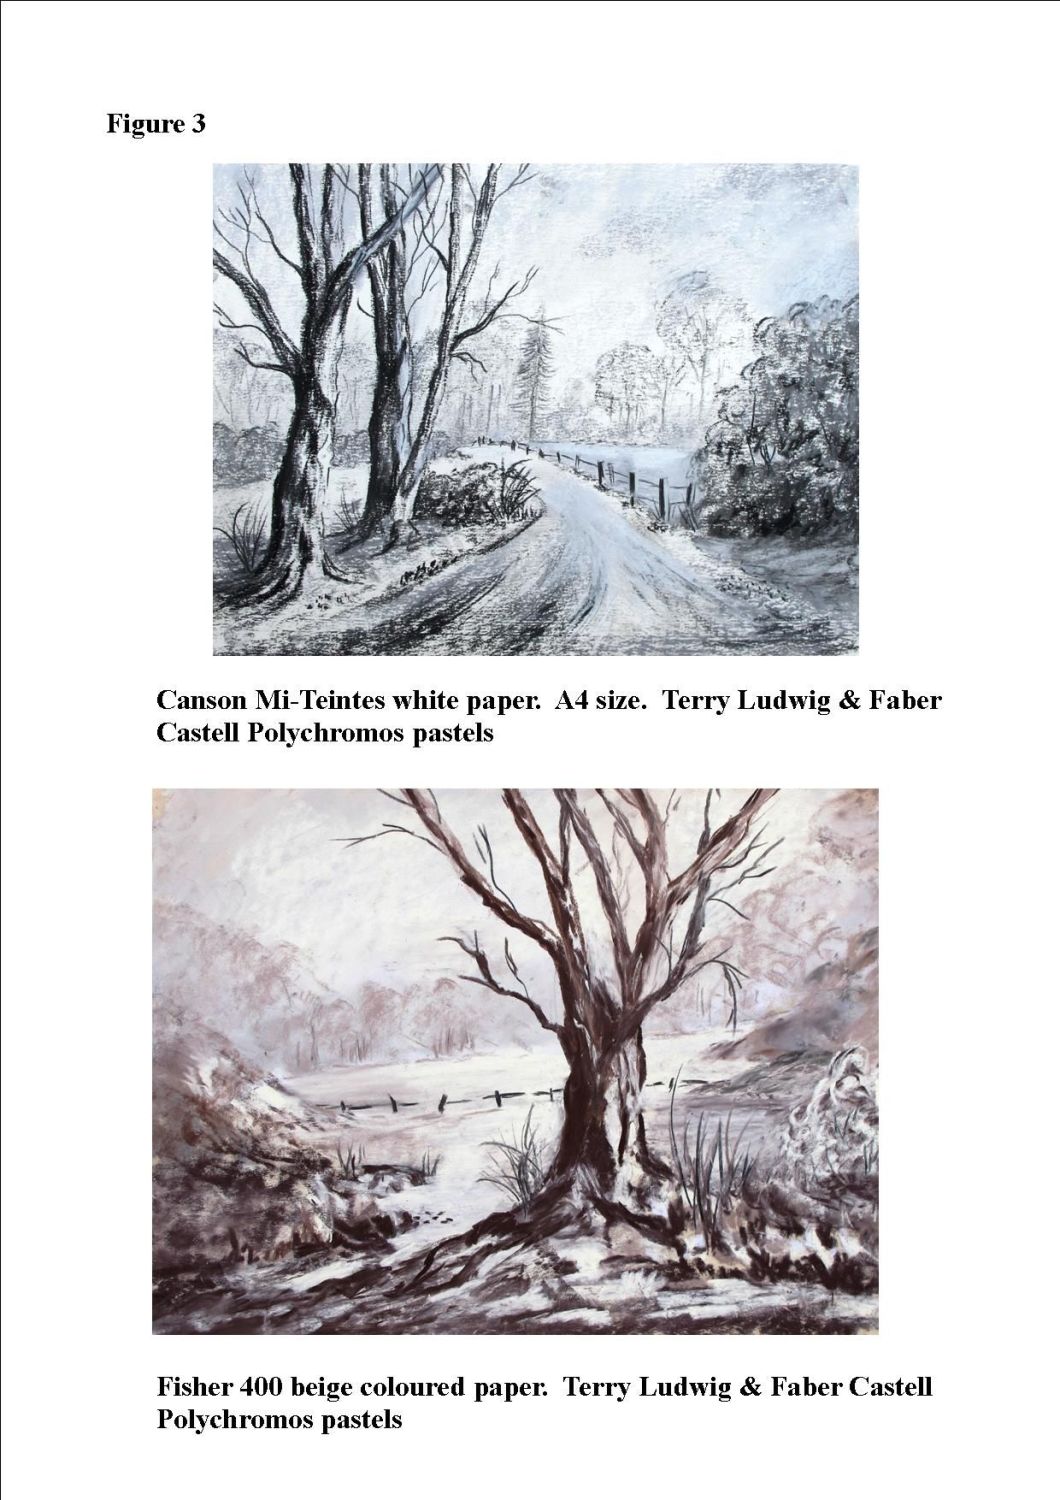
When starting out with pastels, don’t be afraid to do lots of tonal studies like the ones in figure 3. You will find it helps you to concentrate on managing the pastels and to get the effect of depth in your pictures. It would be impossible for me to show examples of every type and colour of pastel paper; you just have to experiment to find a paper that suits your style. The more texture you require the rougher the paper should be. I prefer Clairefontaine Pastelmat, for detail and Canson Mi-Teintes ‘Touch,’ or Fisher 400 for more textural paintings. Before we tackle the following project (the photograph in figure 6), I suggest you try the following exercises.
Try this:
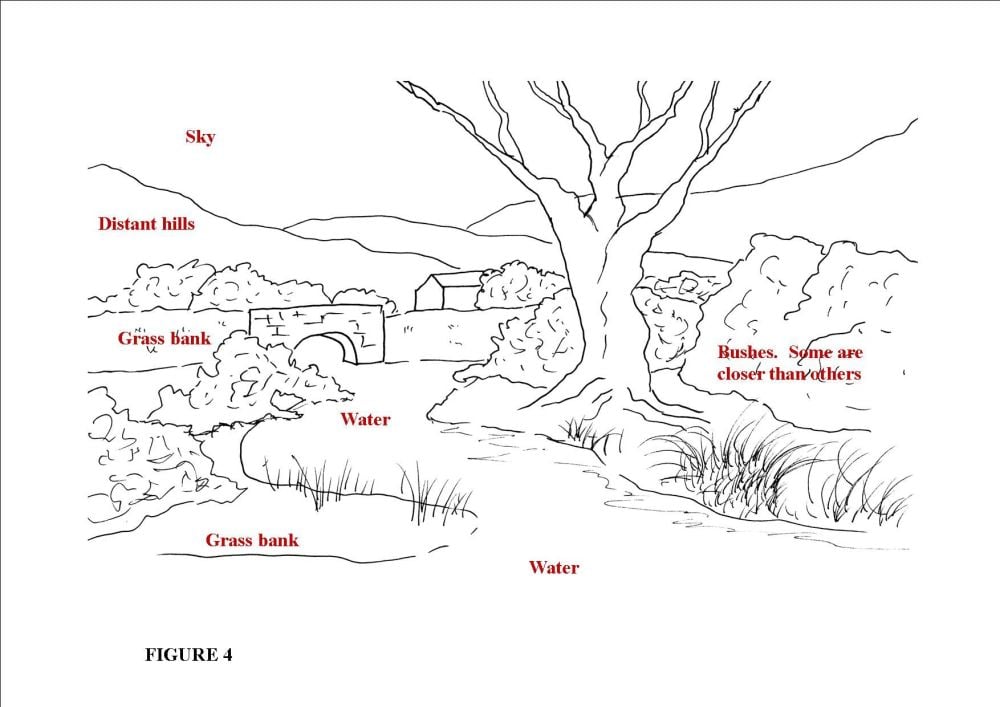
Select just three or four tones of the same colour. Use the little sketch I have drawn in figure 4 and have a go at doing a version of this using just tones of one colour. Make sure you have a definite distance, middle distance and foreground. Choose your direction of light. Keep the majority of your lighter tones and blending for the background and use strong darks, harder edges and some texture in the foreground. You will quickly see that just variations of tone and detail can depict depth and distance in your work.
The colour of your paper
I said in the last blog that I would give some more information about the colour of your paper (support). Most, but not all pastel supports come in a variety of colours. I previously suggested that you start by using a neutral colour. By doing this, your pastel colours will remain true. What do I mean by this? If you look at figure 5.
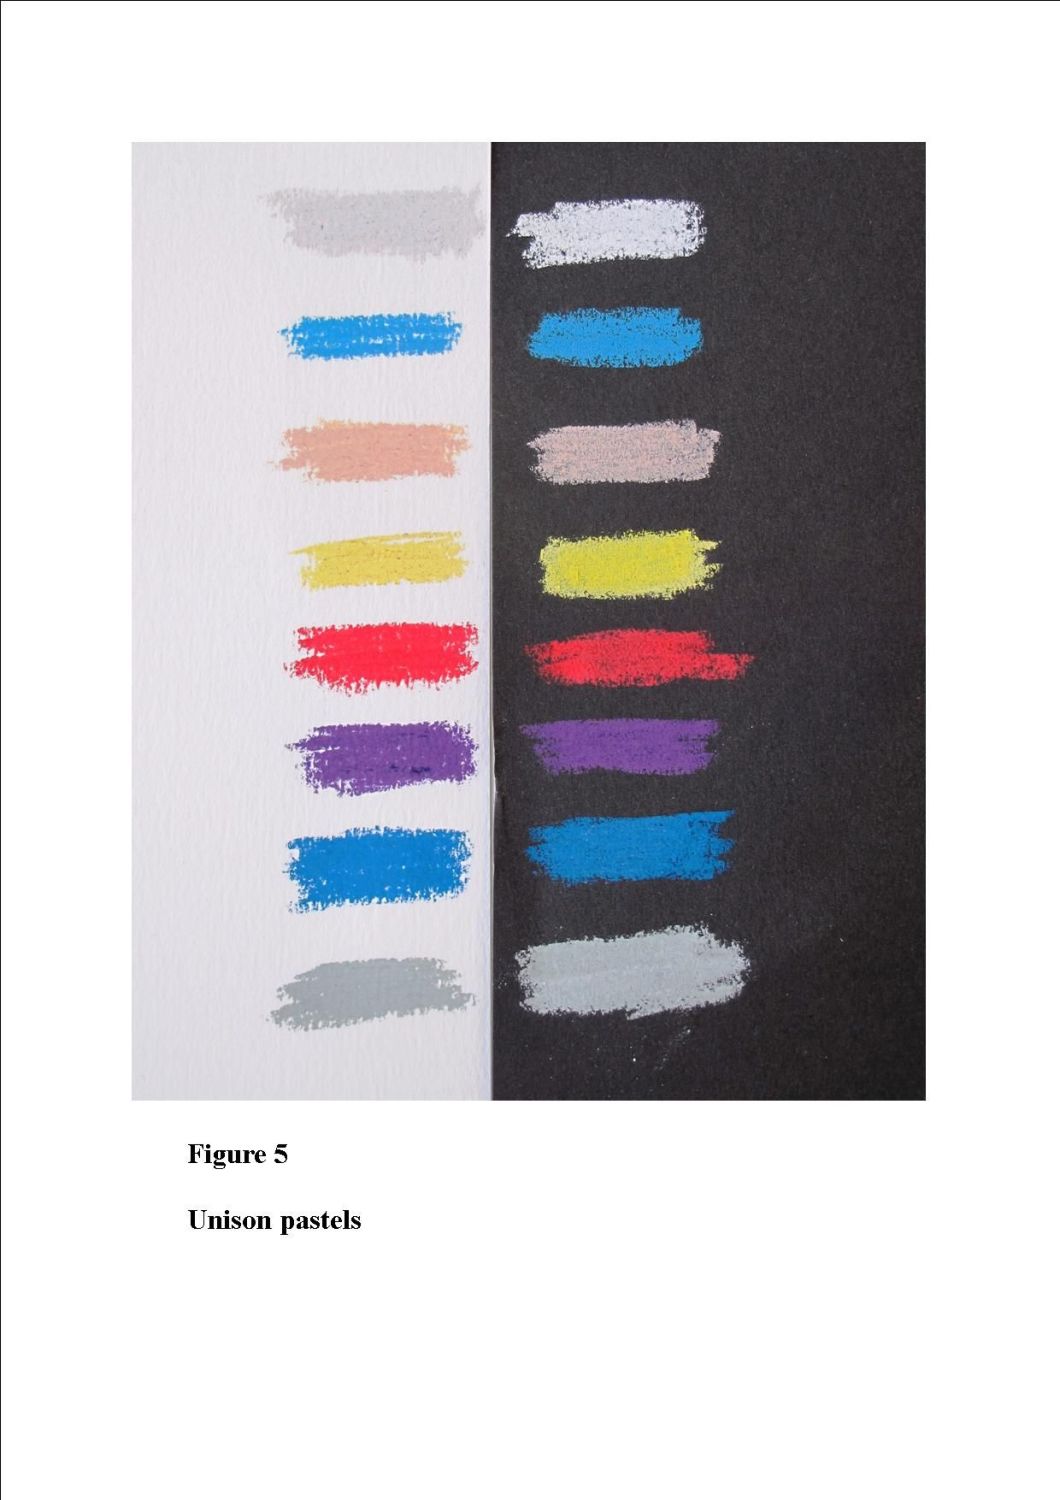
I have put a piece of black paper and a piece of white paper next to each other and stroked different coloured pastels across both papers. You can easily see that the pale grey is almost impossible to see on the white paper but on the black paper it looks quite bright. You can see this effect even better if you cover each side of the diagram alternately. Some of the colours look lighter, some darker and some look a completely different shade. This may not be quite so obvious in the printed form so you need to try this for yourself. You will be surprised at the results! Coloured papers therefore change the appearance of your pastels and this can become confusing when you first start using them. Later, when you have a little more experience, you could start experimenting with coloured papers. They can help to set the ‘mood’ of your painting.
When sketching your subject onto your chosen paper use as little drawing as possible. The more detailed your drawing the more detailed will be your final painting. Just mark the horizon (not in the centre please!). Indicate places for particular objects and leave it at that. You will find you can be more inventive with your pastels if you are not working with a detailed drawing. Remember not to use a graphite pencil for your sketch; graphite lines are quite shiny and pastel will fall off them. I find a neutral colour felt tip pen is excellent. Similar to all paintings, decide on your focal point and plan to enhance this with strong contrasts and/or detail. The rest of the painting should form a supporting role to this focal point. When we look at a photograph, everything is in focus. This is not how we see the world. We only see detail in the specific object we are looking at.
Remember that soft blended edges and cool colours will make a feature recede, whereas warm colours, strong hard edges and detail will make a feature appear closer. When painting landscapes, we need to exaggerate the coolness of the background colours in order to give our work depth and distance. We may see the trees in the distance as bright green, but if we paint them this colour the painting will look flat with no apparent depth.
Putting details into your painting
The obvious way to do this is to use either a pastel pencil or a charcoal pencil. However, you can actually obtain even thinner, more precise lines by taking one of your little hard pastels and sharpening it on a piece of sandpaper (grit 100 – 150). Hold the pastel vertically, press fairly hard and rub the small square end back and forth on the paper. Provided you keep your pastel upright (90 degrees to the sandpaper), you will obtain four sharp edges and four sharp corners. When I am painting animal portraits, I always use this method to draw very fine hairs and whiskers.
Using pastel spray fixative
There has always been controversy about the use of pastel spray fixatives. I find that spraying the final painting just dulls the colours and masks the reflection that comes from the little sparkly mineral fragments within your pastels. However, having said that, spray fixative can have its uses. If you have chosen to do a complete under painting first, you could spray this so that it won’t be disturbed once you add the final layers. Also, if you make a mistake that you are finding hard to erase, you could spray just this area, let it dry and then work easily over the top. I never put a final spray on any of my pastel work. I have transported paintings to various exhibitions around the country and provided I have framed them correctly, they have never come to any harm.
Project
Now look at the photograph in figure 6.
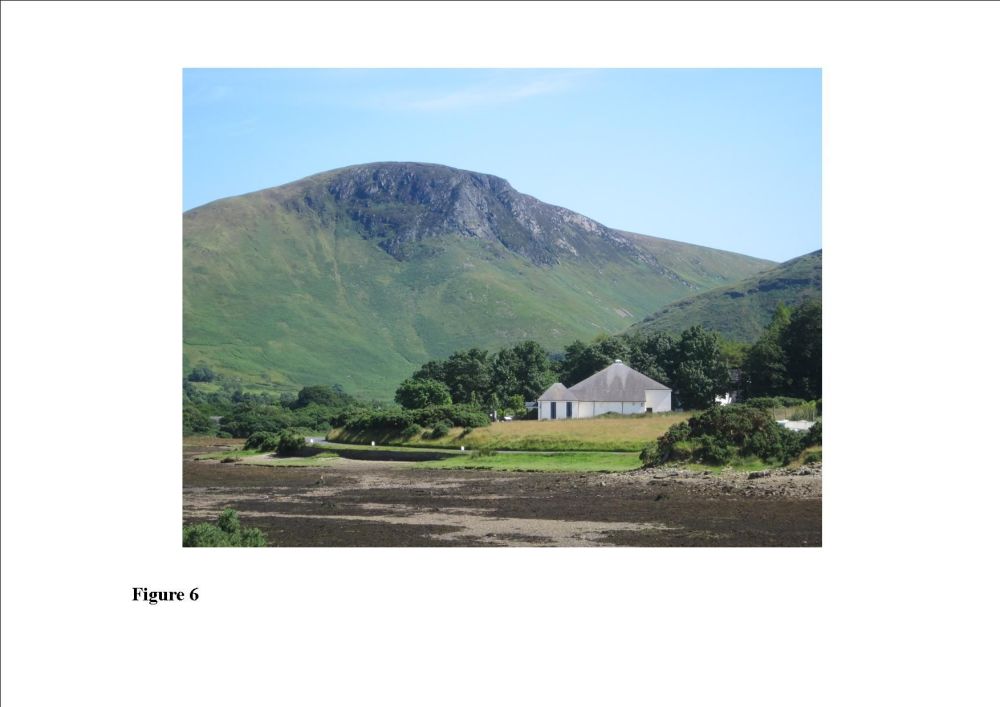 Decide what to change leave out or add. Keep your picture simple. The photograph is just a guide to the actual topic and some overall shapes. The ideal landscape view that is a good composition and appears perfectly balanced, is almost impossible to find. Decide on a colour scheme. As you saw with my two sample paintings last month, using a restricted colour scheme brings harmony to your work. You don’t have to copy the exact colours from the photograph – be adventurous! You will need cool tones for the distance and warmer tones for the foreground but the actual colour scheme itself is up to you. Now do a pencil tonal sketch. Many people don’t bother with this but if you want to get your tonal values right, then it is essential. Once you have done the sketch, it makes doing the actual painting so much easier. You can immediately see where your lightest lights and darkest darks are going to go. Remember the five things that will make your painting shine with life:
- Correct tonal values
- Counter change (light against dark and dark against light)
- Complimentary colours next to each other for impact
- Direction of light consistent throughout the picture
- A well balanced composition
Next time, I will show you, step by step, how I painted the picture.
