Beginning Pastels - Part 1
Posted on
Beginning Pastels – Part 1
by Anne Kerr
There is a great deal written about pastels but I find that not all of it goes right back to the basics. This is what I intend to do in these few blogs.
Pastels are probably the most forgiving of all painting mediums. They give you the ability to change your work in many ways as you progress through your painting. You can remove pastel, put light over dark as well as dark over light. Provided your pastels are of good quality, they will not fade or deteriorate in any way once protected by a frame and glass.
People ask if pastels are the same as chalk. The answer is no. Chalk is made of limestone or gypsum and compressed into powdered sticks with some type of colouring. Pastels are made from pure mineral pigments and usually combined with gum tragacanth or gum arabic and water to hold them together. Good quality pastels will have little or no ‘fillers’ in the product, hence the rich crystal like sparkle they show when spread onto paper. Cheaper pastels will have artificial colouring and little in the way of pure minerals. They will have more bulking and filling agents; therefore they will give a rather matt dull appearance.
There are different types of pastel: oil pastel, soft pastel and hard pastel.
Oil pastel: These usually have quite strong vivid colours and a waxy feel to them. In order to mix them on the paper you need a solvent to break down the binding agent
Soft pastels: These can be in stick form, as pencils or in tiny plastic containers known as pan pastels
For the purpose of these articles, we will look solely at the soft pastels that come in stick or pencil form, as they are in my opinion, the easiest to use.
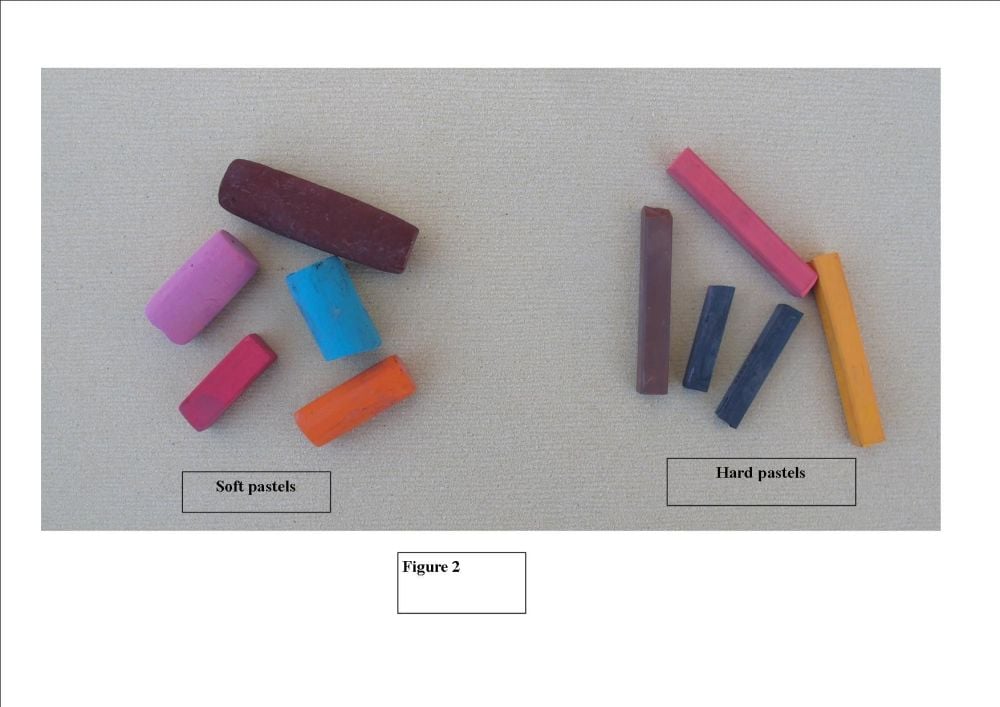
Pastels, like all painting mediums, come in degrees of quality. Usually the more expensive ones are superior. Some soft pastels are extremely soft, very creamy and may crumble easily. Others are much harder, so hard in fact, they can be sharpened to a very fine edge for painting details. When starting out using pastels, I suggest you choose some that are not too soft, you will find these easier to use. You will also need some quite hard ones for painting details. The softer pastel sticks are usually quite chunky and either round or square in shape. The harder pastel sticks are long, quite narrow and square in shape. (see figure 2)

Although pastels can be laid one on top of the other to give a subtle change in colour, they cannot be easily mixed together to form different shades as with other painting mediums. If you rub them together too much in order to mix them, you lose the lovely sparkle that is given off from the tiny mineral crystals within the pastel. It is better to have just a few colours with many variations of tint rather than buying lots of rich bright colours, many of which you will rarely use unless you are a painter of flowers. You can purchase specific starter kits for landscapes, portraits and floral; however it is often more useful to choose your own colours from the huge variety on sale. I suggest you have a selection of colours from the softer pastel sticks and a selection of colours from the harder sticks. Dakota Art has produced an extremely useful chart of good quality soft pastels showing the degree of their softness. Number one on the chart being the softest. Here is the link to that list. https://www.dakotapastels.com/files/pdfs/Pastel-Lineup.pdf I suggest you choose your softest pastels from the middle of the list and your harder pastels from the bottom of the list. Although some artists disagree with the order of pastels on this list, it is however a very good guide. I use a mixture of Uniso, Rembrandt andFaber Castel Polychromos.
Having chosen our pastels, we now need to consider a type of support to use. Again, as with all art materials, there are several choices. Pastels require a ‘tooth’ on the surface to grip the pastel. They will work on any textured surface. Special pastel papers and boards vary from very smooth to very rough and abrasive. The smoother papers, although usually cheaper, do not hold as many layers of pastel and can look rather dull as they need more blending. Very rough abrasive surfaces can give your pastels more richness but they can eat up the pastel very quickly. Therefore, when starting out with pastels, I suggest you use a paper that comes between these two types. Clairfontaine Pastelmat, although appearing smooth to the touch, will hold an enormous amount of pastel. A fine abrasive surface such as Canson Mi Tentes ‘Touch’or Fisher 400 (Amazon) will give you slightly more variations in texture but still allow you to paint fine details. There is another pastel paper called ‘velour’ that feels like suede or velvet. This paper is very different, more difficult to blend on and not one I would recommend if you are just starting out with pastels. I use it for all my animal portrait work. It gives beautiful fur effects but has quite a steep learning curve.
Pastel papers come in various shades; however I suggest you start with a fairly neutral colour as heavily tinted paper can alter the appearance of your pastels. (More about paper colours next time)
Let’s get started
It’s important to find out what our pastels will do for us before we tackle a picture. Although pastels are dry, some colours can still stain. Wear old clothes or use an overall. You can use various implements to blend pastels: rags, paper stumps, pastel blenders etc. However, I have always found that the best and most sensitive blending tool is your hand!
The best way to use pastels is with an easel. Attach your chosen paper to a drawing board but always put a protective sheet of paper behind your work, as any little dents in the board will show through. Using an easel allows you to frequently step back from your work. Put a strip of folded paper or card under the bottom edge of your board to catch any falling pastel dust. An old towel on the floor is also useful. Have a damp and a dry cloth for your hands.
Storing and cleaning pastels
Store your pastels according to colour and tone. You can buy special pastel storage boxes that have many small shallow sections. However, these are not particularly cheap and I find that most DIY shops have storage boxes that will serve the same purpose. It is useful to choose a box where you can rearrange the storage sections to suit your needs. Line your box sections with thin foam pads. These can be taken out and washed when they become very dirty. Cleaning your pastel sticks is easy. Buy a pack of ground rice and tip this into a plastic container. Drop in any pastels that have got dirty, rub them around in the ground rice and they will come up sparkling clean! Only change your ground rice when it gets really dirty.
Pastel pencils
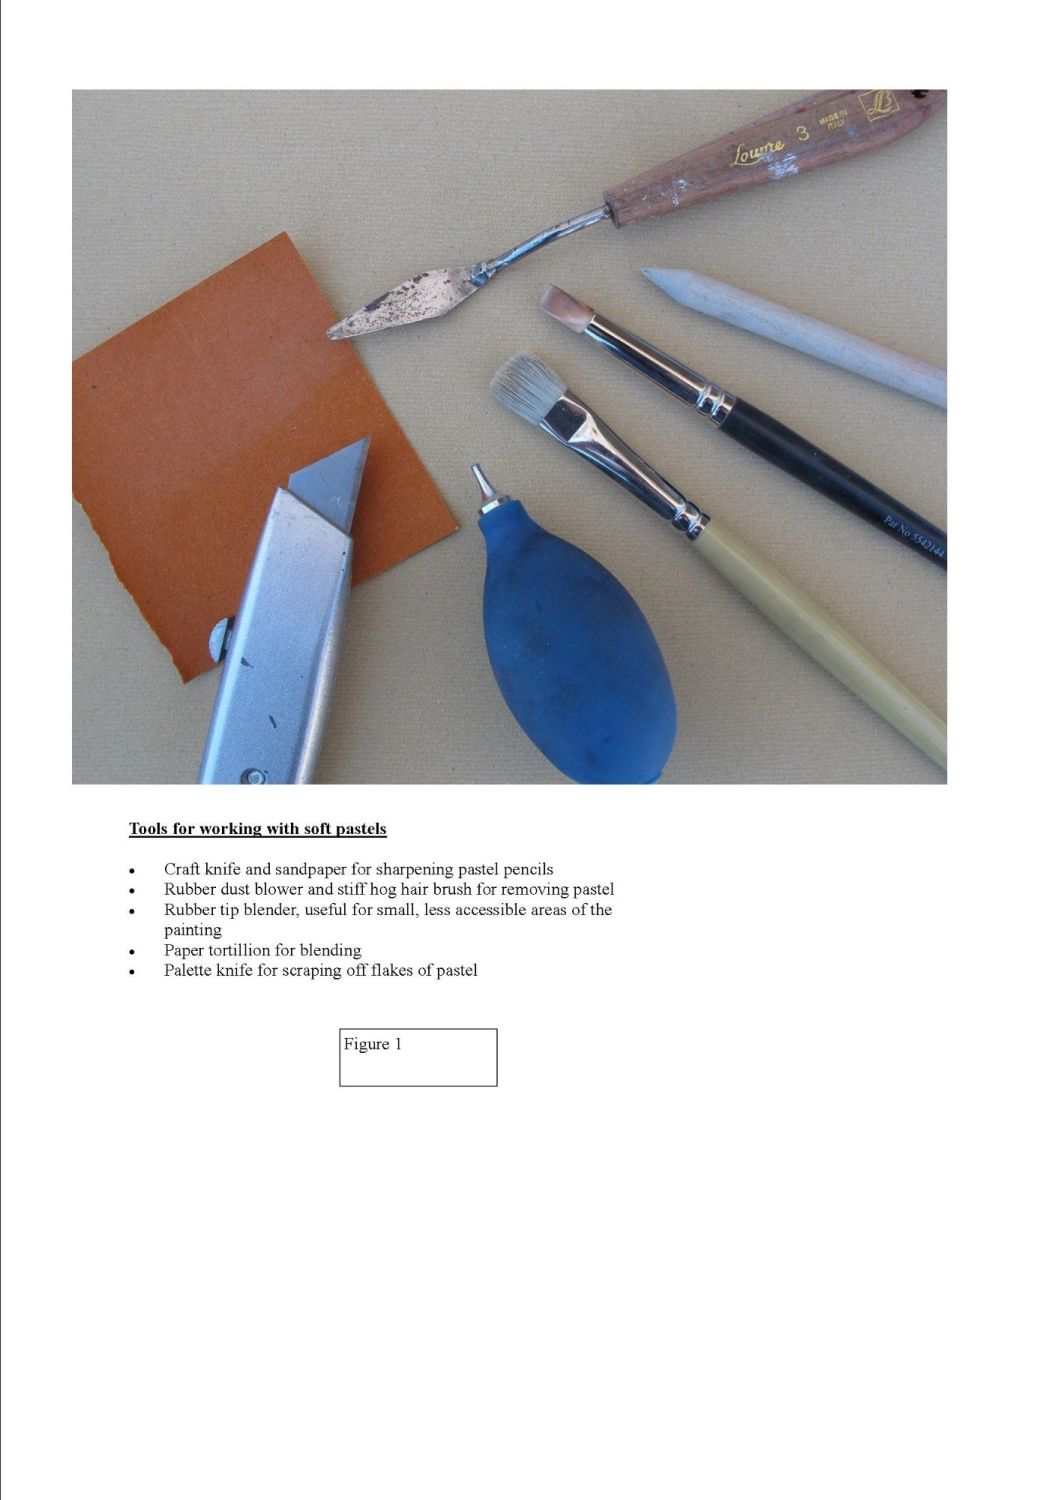
These are classed as soft pastels and like the sticks of pastel they come in degrees of softness according to the make. A good choice of pastel pencil would be ,Faber Castell Pitt pastel pencils or Caran D’Ache. The pastel pencils do not vary as much in the range of softness as do the sticks of pastel. It is not easy to sharpen pastel pencils with a pencil sharpener so a craft knife will be needed. A fine grade piece of sandpaper (100 - 120 grit) will help to get a very sharp point. If you want really dark black lines, then a charcoal pencil will be darker than a black pastel pencil. Charcoal is also harder than pastel so sharper marks are possible.
Figure 1 shows you all the tools (except the easel) that I use for painting with pastels

Pastel techniques
It’s important to remove any paper coverings from your pastels and break them into manageable pieces. You can then use the whole of the surface to make wide strokes that cover your paper quickly. The edge or corner of the pastel will give you narrow lines. Blending colours together by overlapping them slightly will give you soft lines. Gently running one pastel across the surface already covered with another colour will give you texture. The lighter the pressure on the pastel the more texture you will obtain. You can stipple your pastels to obtain a different type of texture and you can scrape off little flakes of pastel onto your painting for sparkly highlights. All these techniques are demonstrated in figure 3. I used Fisher 400 paper to give a good visual teture.
Figure 3.
Tip
Don’t use a graphite pencil for your initial drawing. Graphite lines are very smooth and shiny. Pastel will not stick to them. A neutral colour felt tip pen, pastel pencil or charcoal pencil will work well.
Correcting mistakes
Pastels are so forgiving. If you make a mistake or want to change something, just brush the pastel off with a stiff haired brush or blow it off with a rubber dust blower (see figure 1)
Health & Safety
This is mainly a matter of common sense. Think carefully about using pastels if you have respiratory problems. Gently knock excess pastel off but don’t blow pastel dust around your room, do this outside in the fresh air. Keep your hands as clean as possible and try not to eat when using pastels.
Try This
When you have collected your materials, spend time practicing different pastel strokes on your paper (see figure 3). When starting with a new painting medium, don’t be in a rush to paint a whole picture. Do little sketches; choose a few colours and try out your pastel strokes. Think about a colour scheme for your sketches so that you are not tempted to use every colour in your box!
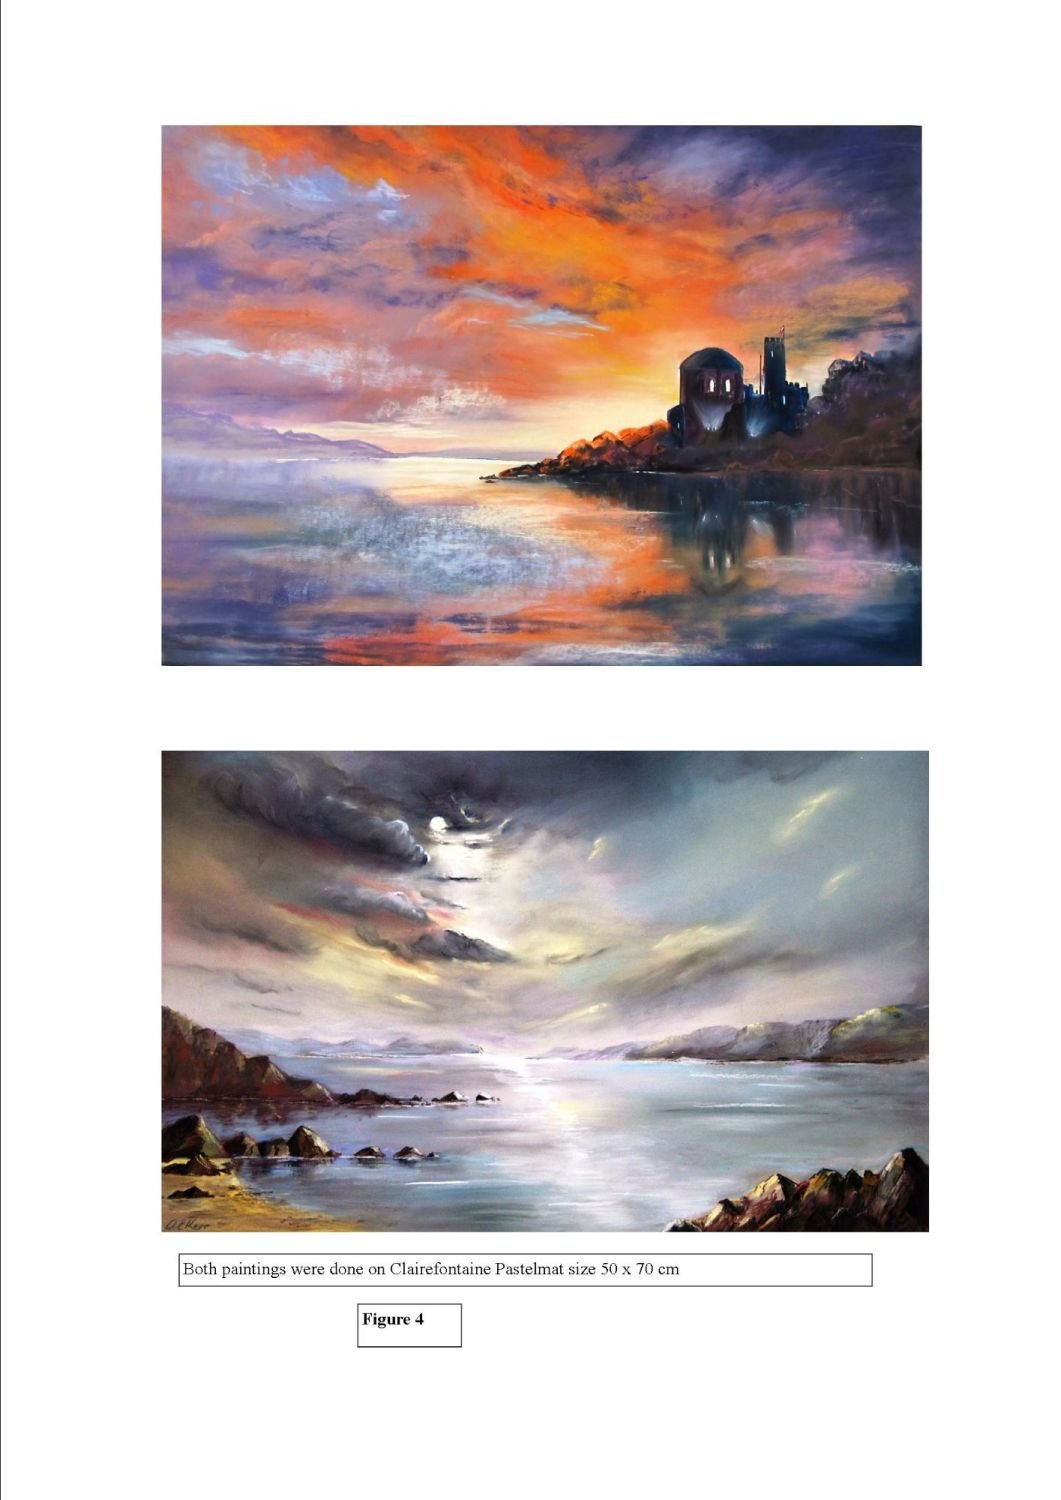
If you look at my paintings in figure 4, you will see that they each have a definite colour theme running through them. Restricting your choice of colours helps to harmonise your work.

In the next blog we will look at a landscape photograph and think about ways to tackle it using both soft pastels and pastel pencils.
